QL Server Setup Guide (On-Premise)
Installing Microsoft SQL Server
(a) Navori QL requires Microsoft SQL Server, in either SQL Express (less than 50 players) or SQL Standard
(b) If you wish to use an existing SQL Server (must be at least SQL 2012 R2) with QL 2.2.5 and above requires a minimum of Windows Server 2016 and SQL Server 2016 and above.
(c) The version of SQL must be compatible with the Windows version of the server
Note – For QL 2.0 and above you must install Windows Server 2016: use SQL Server 2016
If you go for Microsoft SQL Express, please use the download links above. These are links to SQL Express with Advanced Services.
Microsoft SQL Server can be installed on the same PC on which you are installing Navori QL Server, or it can be installed on a remote PC.
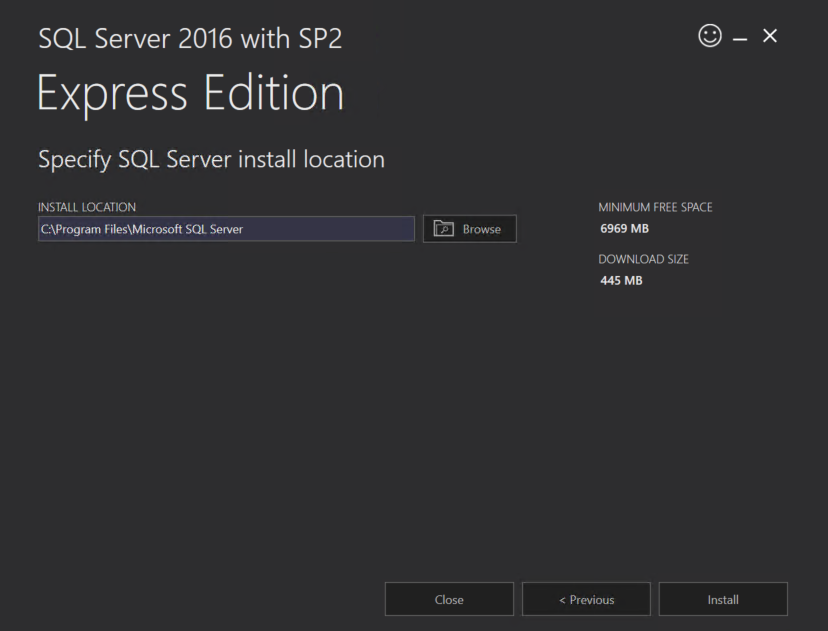
- Launch the SQL Installer and click BASIC.
Accept the TERMS & CONDITIONS and click INSTALL

2. Once installed Select CUSTOMIZE

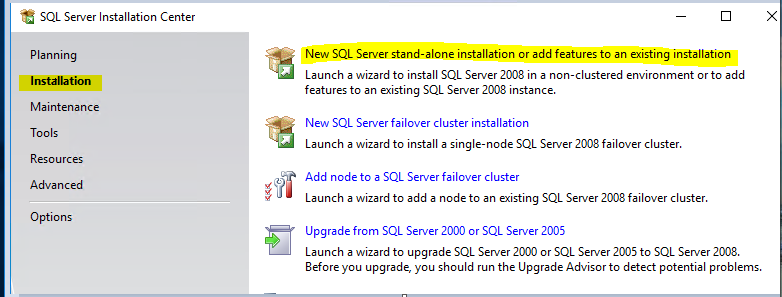
3. Select “New SQL Server Stand-alone installation or add features to an existing installation”.
4. Accept terms of services, and click “Next”
5. Leave “Use Microsoft Updates” unchecked, and click “Next”
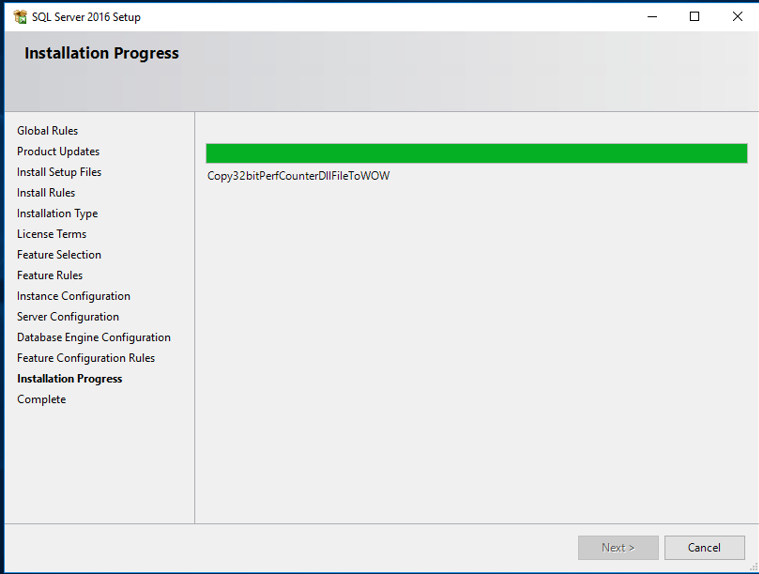
6. Allow the Install setup to run. Once completed, click “Next”

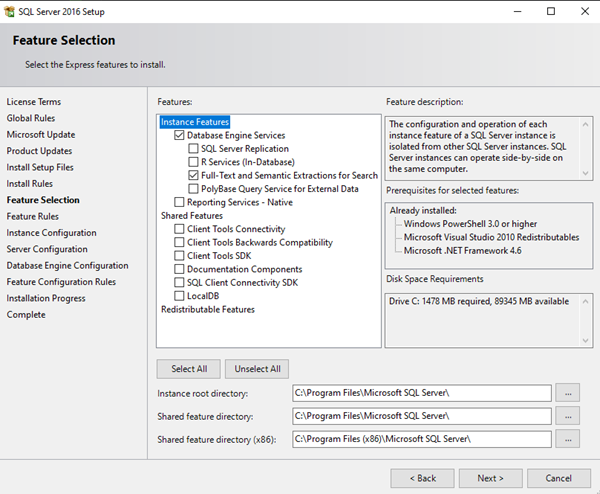
7. Select the features as per the screenshot below:
8. At this step you need to select “Named Instance”. You can let the default name “SQLEXPRESS” or use any other name and click “Next”

9. No action is needed on this page, click “Next”
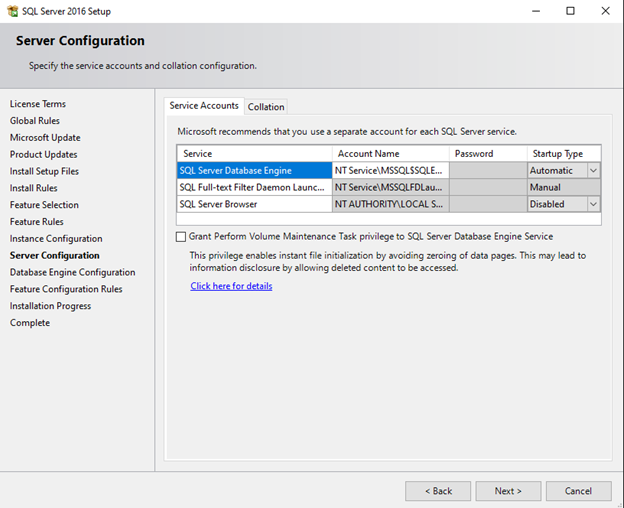
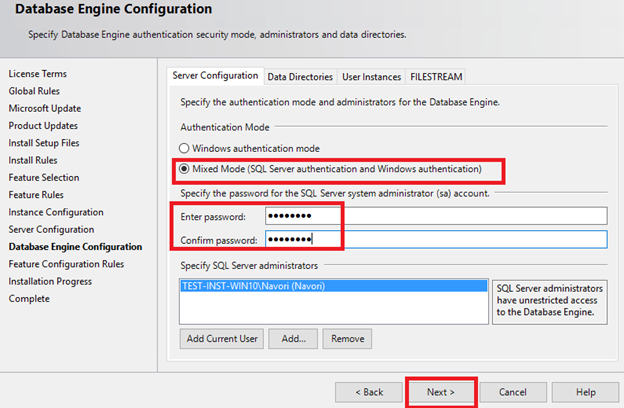
10. Authentication mode: At this step, you need to select “Mixed mode”, this is an important step. Enter a password, that will be the password of the default “sa” SQL account. Then click “Next”.
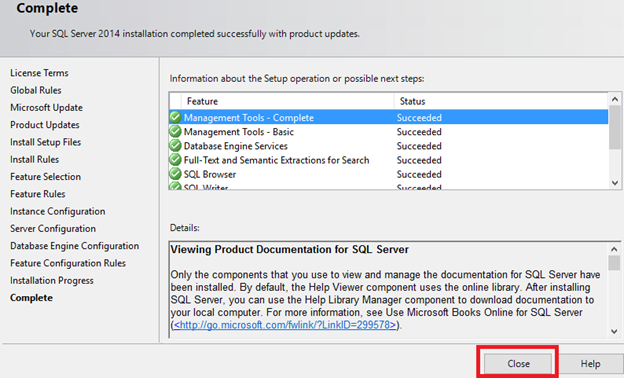
11. You have successfully installed SQL Server, Click “Close”
Microsoft SQL Server is now installed.
Now you may want to create an SQL account, dedicated to Navori.
Launch SQL Management Studio program.
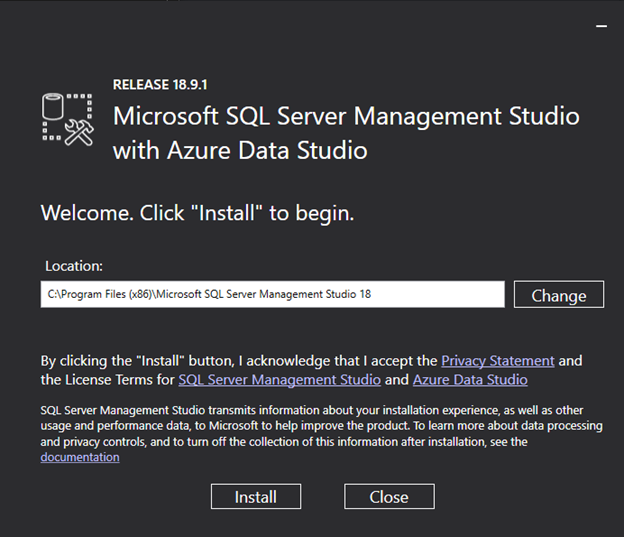
If you do not have SQL Studio Management Installed, please install it.
Use the provided link on the SSMS page to download the latest version of SSMS
Once downloaded launch the SSMS installer, and select click install.
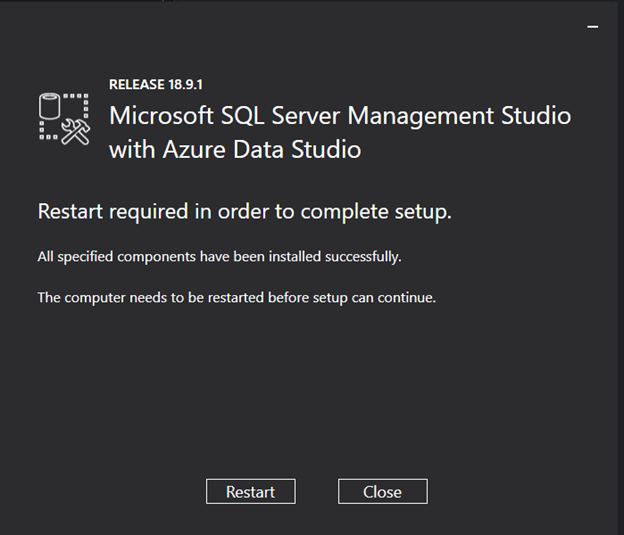
Once the install is complete, click “Restart”. You have now successfully installed SSMS.
2. SQL Server Configuration Setup
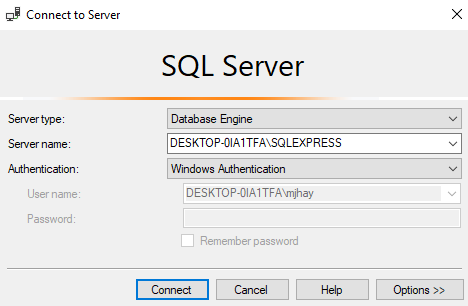
Launch Microsoft SQL SERVER MANAGEMENT STUDIO

The server name should be correct by default. Select “Windows Authentication” and hit the “Connect” button.
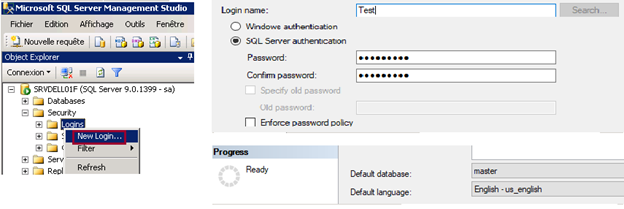
3. Once you are connected to your SQL server open the Security folder, right-click on Logins and select New Login…
When creating your new login account you must set it to use SQL Server Authentication.
Uncheck Enforce password expiration to prevent the password from expiring.
Set the default database to master and Default language to English
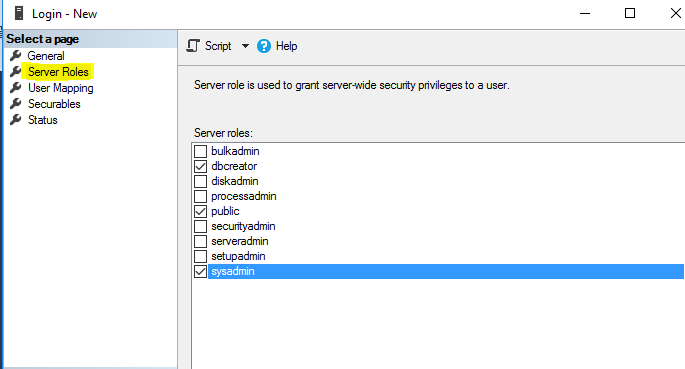
Next, you must assign the Server Roles and User Mappings settings.
Under Server Roles, select dbcreator, public, and sysadmin.
Note: The dbcreator and systemadmin role are only required for the QL Server Installation and can be removed after the QL Server Installation is complete
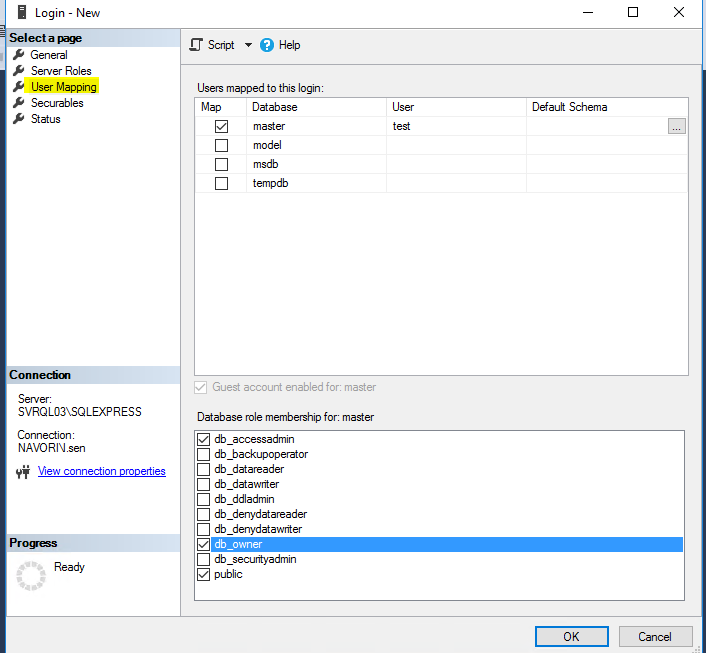
Under User Mapping select Master in the top pane and db_accessadmin, db_owner, and the public in the bottom panel.
Click OK to save the user.
When you have completed creating this login account, your SQL Server will be ready to use.
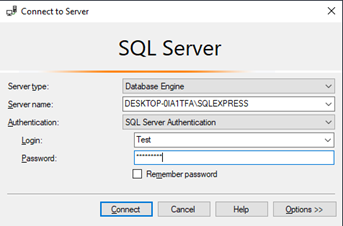
Test out your new SQL login user by connecting to the SQL Server using SQL Server Management Studio and the new login account.
If the connection fails, make sure your SQL Server is configured to accept both authentication modes.
To check this open the Server > Properties and go to the Security tab.
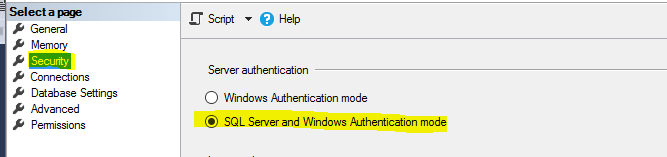
Under Server Authentication, make sure to select SQL Server and Windows Authentication mode.
Restart SQL Server.
Try connecting to your SQL server using the new Login account again to confirm that it works.
The next section describes how to configure Microsoft IIS server so it can be used with Navori QL Server.
Special considerations for SQL Server in a DMZ
1. By default, Navori QL looks to access the SQL Server via a name and not an IP address.
2. If your SQL Server installation is set up so that the SQL Server Name corresponds to an “IP:Port Number” (such as is the case in a DMZ
Eg. you must enter the address as in the following example: 10.2.230.4,5000 (substitute the example IP address and port number with your installation IP and port).
Note- You must separate the IP address from the port number using a comma (,) and not a semicolon (:).
2. Installing Navori QL Server
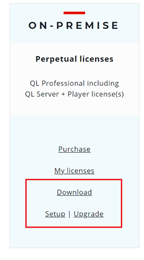
1, First, you will need to download the QL Server installer from your Navori Extranet account.
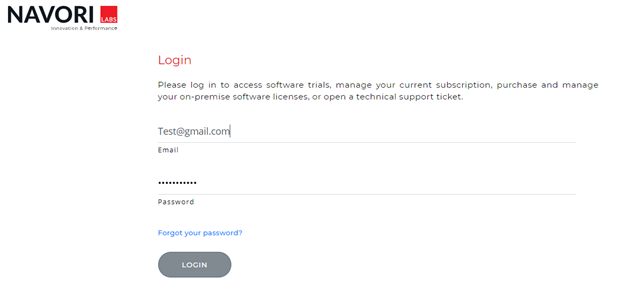
To do so, login to your account from https://navori.com or https://extranet.navori.com
Once you are logged in, you can download the QL Server Software.
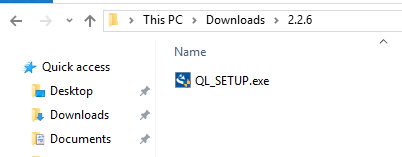
2. Launch the installer (right-click > run as Administrator) and follow the steps.
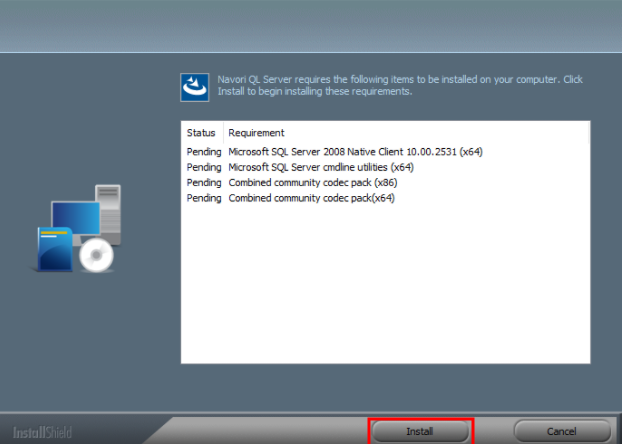
3. Click “Install”
Note: The Navori QL installer will install all prerequisites. Adobe Flash and/or other requirements may be listed, as this is dependent on what prerequisites your machine does not currently have installed.
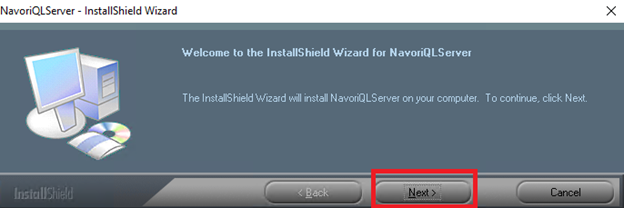
Click “Next”
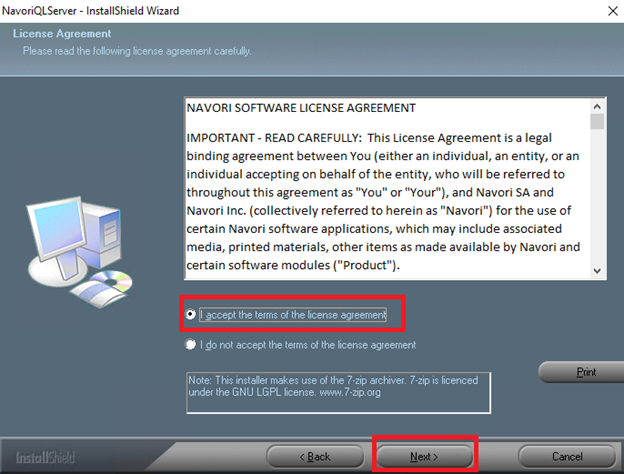
Agree to the TERMS AND CONDITIONS and click “Next”
At some point, you will need to reboot the machine.

After the PC reboot, the Installer should automatically relaunch, if not you can relaunch the installer.
If you run into an infinite reboot loop, please see FAQ: How to fix infinite reboot loop
IMPORTANT POINTS:
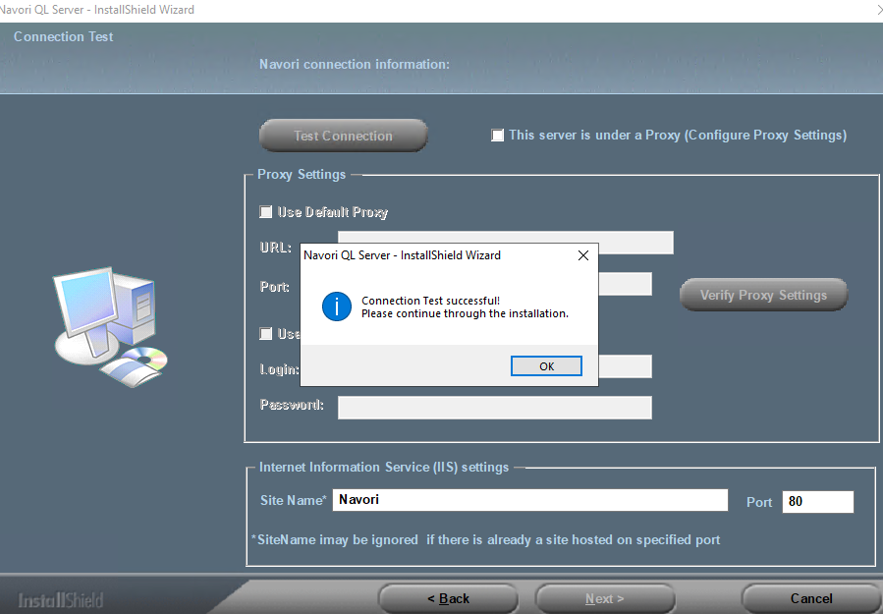
- First, you will have to check the internet connection. The installer needs it in order to activate the license.
- If needed, you can enter proxy information.
- Then you will need to enter some information.
- SQL Server: the installer will automatically retrieve the local instance, but you can enter other values, for example, if the SQL server is installed on another server.
- Enter the username and password of the SQL user you created previously. Hit the “verify” button.
- Navori Extranet Credentials: enter your Navori account credentials, and copy-paste the serial number from the delivery note. Hit the “verify” button.
- Navori QL Server Configuration: enter the server address, and select a folder in which Navori will store its media files (must be a local disk).
Note: As of QL 2.2.5 Navori no longer asks for an IP Address or DNS, your server will be installed with HTTP://Localhost by Default and you may use your IP or DNS to access your Navori QL Manager.
Press TEST CONNECTION if you do not use a Proxy and Press Next
If you require a proxy please enter your proxy information and press Test Connection to confirm.


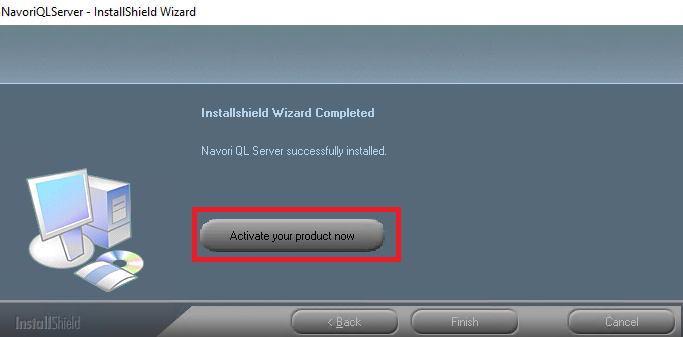
When the installation is done, Click “Activate your product now” and click “Finish”. You Must Activation your product.
*Note: If your activation failed see FAQ: Activation Failed*

1. Upon successful license activation you will see the message “Product activated successfully”.
2. Leave the Run NavoriQLServer now box checked to automatically launch the application in your web browser.
3. Click the Finish button to close the installer.
4. If you left the Run NavoriQLServer now box checked Internet Explorer will launch and you will be presented with the QL Manager login page.
5. Navori QL Server is automatically configured with a default user account created from your Navori Extranet email address and password.
6. You will log into your QL Manager using your Navori Extranet credentials.
3. Logging into you CMS
Default User Account
The installer will create a default user account. This account has root administrative rights for this Server and is created during the Server installation using your Navori Extranet credentials (email address and password).
Example: Your Navori Extranet login name is test@navori.com and your Navori Extranet password is: Navori@123. Once you have completed your Navori QL Server installation you can log into your server using your Extranet account.
When you type your login name and password into the QL Manager login screen and press the Connection button, you will see a loading screen followed by the QL Manager application interface.

Your Navori QL Server software is now installed successfully and running.