QL Server 2.0 Login
Here is how you login to QL Server 2.0 using the Content Manager.
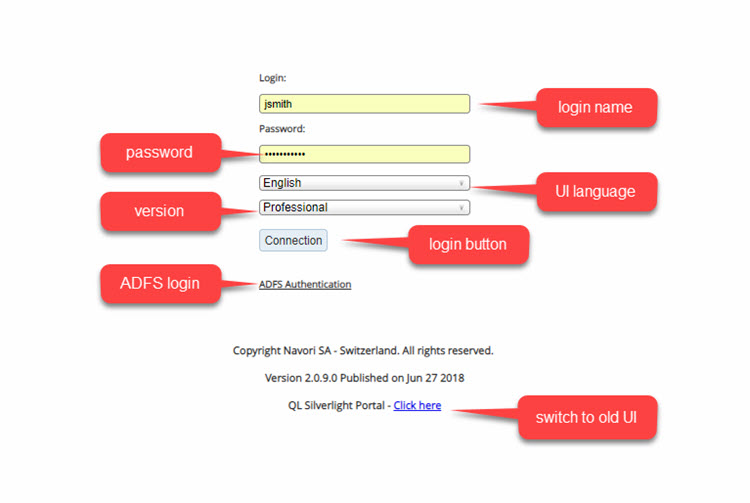
- Enter the QL Server URL (IP address or DNS) in your web browser to access the login page.
- Type your assigned login name in the top field.
- Enter your password in the second field.
- Select the user interface (UI) language. The default is English.
- Select the QL 2.0 software version (options are Professional or Express).
- Click Connection to login.
Note (1): Microsoft Acive Directory users must select ADFS Authentication to login. These users don’t need to enter a separate password.
Note (2): Users who prefer to work in the previous QL Silverlight dashboard should click the link at the bottom of the page. This will load the Silverlight UI. Be advised that not all current features may be accessible through Silverlight. Navori recomments the HTML5 UI for the best user experience.
Note (3): Users who wish to use the Live TV feature (requires Hauppauge hardware and software) must login via the QL Silverlight dashboard. Live TV control is currently not available in the HTML5 UI.
Note (4): Beginning with QL version 2.2, users are automatically logged off after 60 minutes of inactivity.