How to Install QL Player on Windows (saas and self hosted)
IMPORTANT INFORMATION
Please consider the following points before you install the QL Player software on your Windows PC.
- Make sure you are logged into windows with a local/domain administrator account.
If you can’t use a Windows Administrator account for QL Player, you must install the software from a local administrator account. Once you have completed the QL Player installation, you can switch to a local user account as long that this account has administrative privileges over the QL Player folder and its subfolders.
Click here for the QL Player Download and Installation video tutorial.
Please see FAQ: Windows – How to set permissions on Navori QL Player folder.
- UAC – You must disable User Account Control for QL Player to function. The QL Player software installer automatically disables this feature but be aware User Group Policies can re-enable UAC so it’s important to make sure this Windows feature is disabled.
Please see FAQ: Disable UAC
- SPECIAL NOTE for Windows 7 and 7 Embedded users. As of QL Player v2.1, the Windows 7 and Windows 7 Embedded operating systems are no longer supported. We recommend you upgrade your OS to the current Windows version.QL Player versions prior to 2.1 can still run on Win 7 / Embedded without any issues, but you should be aware of this new requirement in case you have auto-player software updates enabled for your QL Player Windows PCs.
Installation Steps:
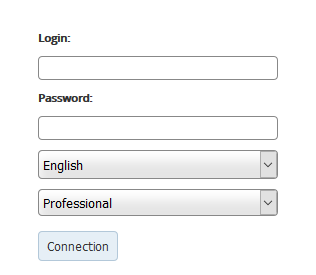
Launch your web browser (from the Player PC) and type your Navori QL Server’s IP address or DNS name. You should see the QL Content Manager login page come up next.
Important: if you use Windows 8 or 10, launch Internet Explorer from the desktop, not from the Metro interface, otherwise Windows UAC will be reactivated which will cause issues with Ql Player.
Type in your login name and password then click Connection.
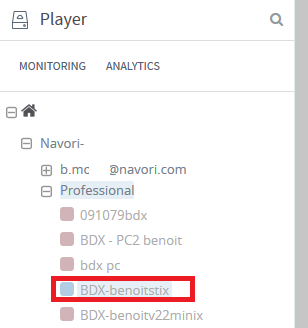
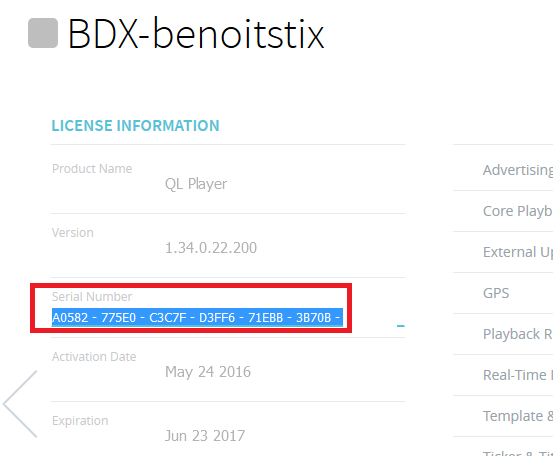
Note for self-hosted QL Server users : Once you are logged in, retrieve the Player license serial number by double clicking on the Player’s name and go to the License information section. Highlight the entire serial number and copy it to the Windows Clipboard (keyboard shortcut: Ctrl+C) so you can paste the license when prompted by the QL Player installer.
Click Cancel to close this window and continue.
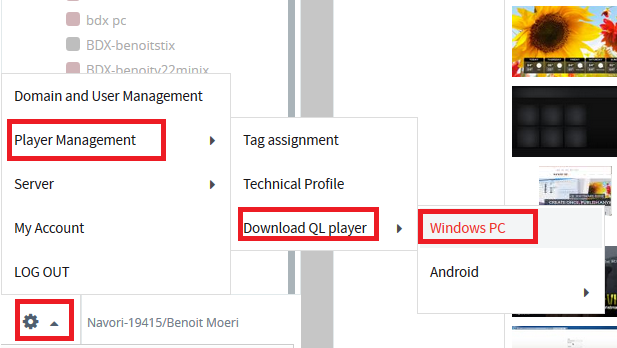
Select Menu > Player Management> Download QL Player > Windows PC
You will be prompted to download and run the installer on your PC. Save the file to your hard drive.
Locate the QL Player installer software on your hard drive.
![]()
Launch the installer and a window will appear, click Next.
The End User License Agreement (EULA) will appear. You can print a copy of this agreement for your records. You must acknowledge this window and click Next before you can proceed.
Once the installation has completed, you will be prompted to enter your license information to activate your software.
Self hosted users:
Enter your Navori QL Server’s URL in the top field (without the “/DigitalSignage” part. For example: http://192.168.105.102, not http://192.168.105.102/DigitalSignage).
Enter the Player’s serial number in the second field.
This is your activation key.
**NOTE: The “space, dash, space” between each set of 5 characters must be typed in exactly as it appears in your confirmation email. This is why we recommend copying and pasting the licence into this field.**

QL Cloud (SaaS) users:
Enter your QL Cloud credentials and then click ‘Retrieve Serial Number” and select one of the available licenses that appears in the pull-down field below.

If you use a Proxy Server, select the “Configure connection through proxy” setting to “Yes” and fill-in the fields.
Once your software has completed its activation process you will see the window below. Click Finish to complete the process. QL Player will launch automatically after a few seconds and the default media will appear on screen.

When you log back into QL COntent Manager you will see notice your QL Player status indicator will change from grey (not activated) to blue (activated and functional) . This indicates QL Player is communicating with QL Server and ready to receive its content and programming.