Tagging Content
Overview
Meta tagging is a two step process. First, you assign tags to your players. Next, you assign tags to your content. You can only assign tags to content once they have been created and assigned to players. Once the tag has been created, you can use it as many times as required.
When the player and the content’s tag matches, content will play on that player (this is the default behavior, however, you can also create tags that prevent content from playing when there is a match).
- Click here for more information about how tagging works and how to assign tags to your players.
- Click here for the Tagging / Location Specific Content video tutorial.
Tagging your content
- You can tag any content, including: media files, web URLs, streaming video, live TV and templates.
- Tags are assigned in the Content Properties. You can tag content when you add it to the library or do it later.
To assign tags to content already in your content library, double click its thumbnail. The content properties will open.
The tag section is on the second screen.
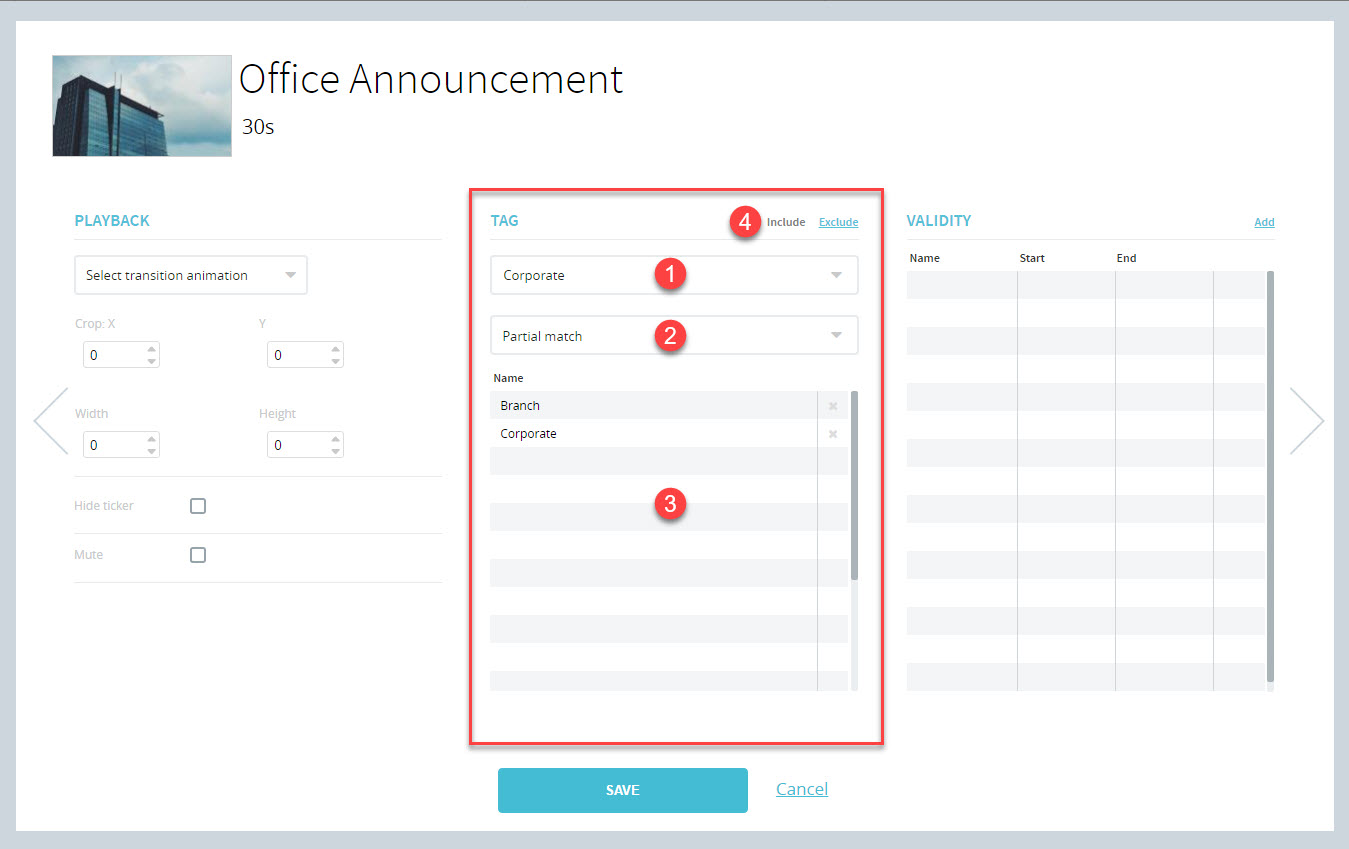
1. Tag selection drop-down list. All tags assigned to players will appear in this field. Selecting a tag will automatically add it to the assigned list (#3).
2. Matching type. There are two options to choose from. Partial match and exact match.
- Partial match means that players must have at least one of the tags assigned to the content.
- Exact match means all the assigned tags must also be assigned to the player. If you don’t have an exact match, the content will not play.
3. Assigned tag list. This is where your assigned tags will appear. To remove tags from the list, click the X in the right column.
4. Include/Exclude content.
- When include is selected, the content will be shown by players that have the matching tag(s).
- When exclude is selected, content will not be shown on players that have the matching tag(s).