Tagging Players
Overview
Tagging is an extremely useful feature that lets you enforce unique content playback rules. In a nutshell, you assign meta tags to players based on your needs (for example, you could use a tag to indicate a player should only be playing content in a particular language, or of a specific nature). Next, you assign tags to your content according to their intended use. An ad could be tagged with the word “english” or “HQ” to ensure it either plays on specific players, or is excluded of specific players. Both options are available, so you have complete control over the location where content will appear.
Tagging works with your QL group and sub-group hierarchy. If you tag content assigned to a top level group, you can use this content anywhere in your network and use tags to ensure it’s only visible where you want. English content plays on english screens. HQ content only appears on employee facing screens, and so on…
Meanwhile, all “untagged” content in a playlist will play on all players.
Tagging is one of the many programmatic features available in the QL software platform.
Click here for the Tagging / Location Specific Content video tutorial.
How does tagging work
Here is an example illustrating how tagging works.
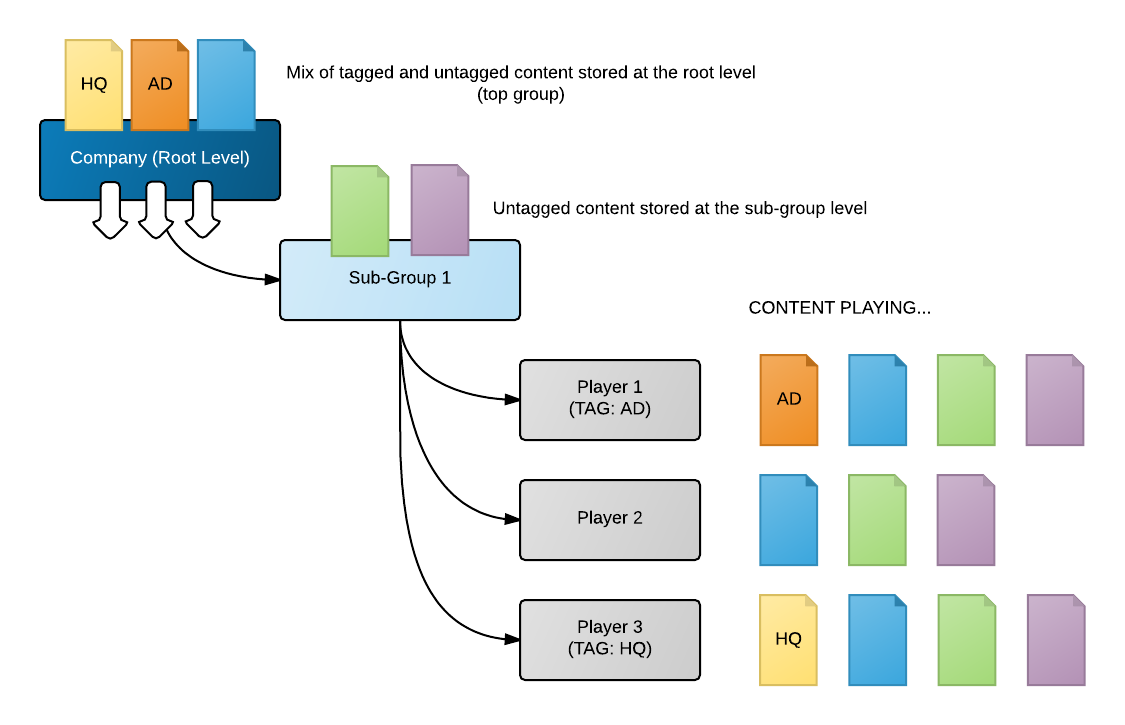
In the example above, we have a mix of content (tagged and untagged) stored at the top (root) level. We also have some untagged content stored at the sub-group level, where the players are located. Assuming that we have the same playlist with all the upper and lower level content programmed, the players will display content as follows:
Player 1: all untagged content, both local and global + any content tagged with the word: AD
Player 2: only untagged content, both local and global
Player 3: all untagged content, both local and global + any content tagged with the word: HQ
Tagging a player
To add tags to a player, double click its name in the Player window. This will open the Player properties.
On the first screen, you will see the tag section on the right. The tag section features a pull-down menu that will show all the previously added tags.
Adding new tags
To add a new tag, click the grey button right of the pull-down menu and select the option Create tag.
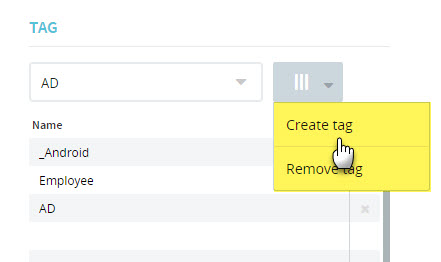
The new tag will be added to the pull down list. You may now select it and add it to your player’s tag list.
- Tags can be added and removed from any player at any time.
- You can assign multiple tags to any player.
Removing tags
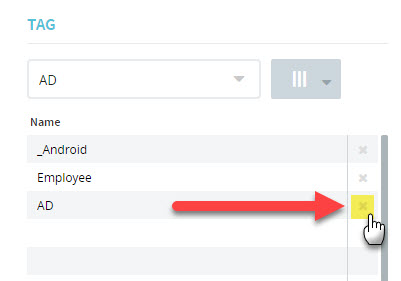
To remove a tag already assigned to a player, click the X in the right column in the Tag list.
IMPORTANT!
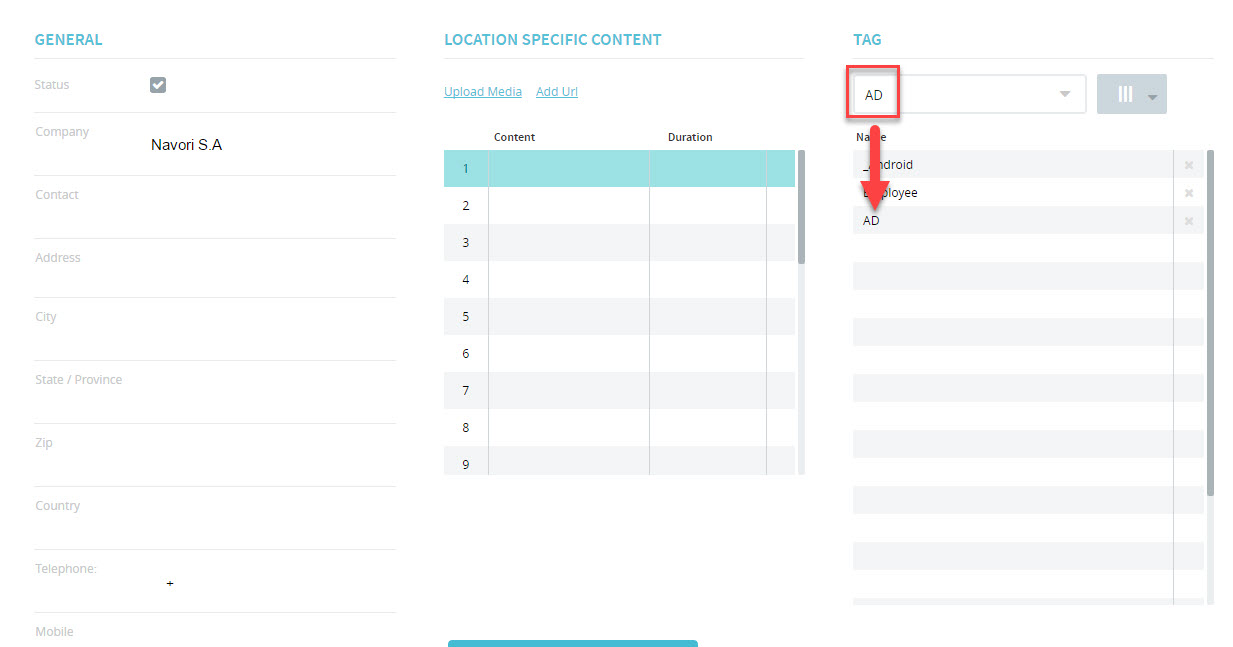
- Tags must also be assigned to your content (this includes any media files, web URLs, streaming video, live TV and templates).
- Content tags have additional options you can use to further control how the player will respond (ex. include or exclude tagged content, if more than one tagged assigned – require one or all tags to be present).
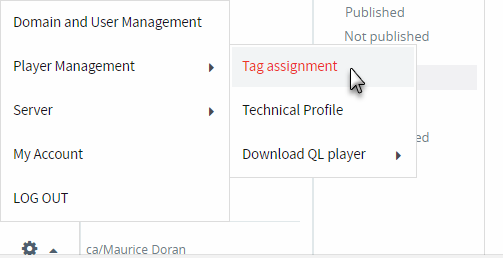
Tagging multiple players
You can assign tags to more than one player at a time. Select Main Menu (gear) > Player Management > Tag assignment.
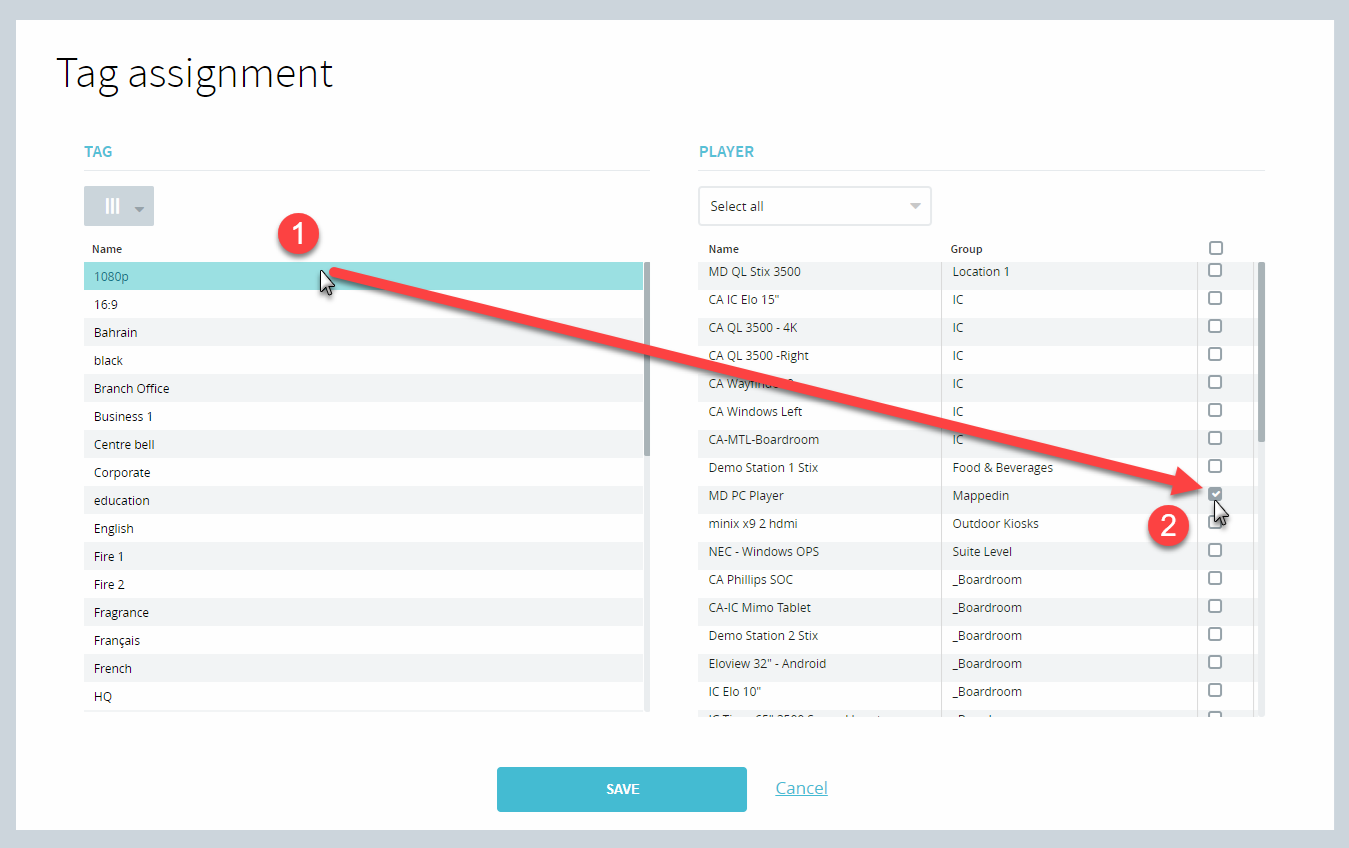
This will open the Tag Assignment window.
The left column shows the list of all existing tags, while the right table shows the list of all available players.

To assign a tag, select it in the left column and then click the check box next to each player you wish to assign it to. You can select as many players as you like for each tag.
You can also create new tags in this window. To create a new tag, click the grey button above the existing tag column on the left of the window. Then select Create tag.
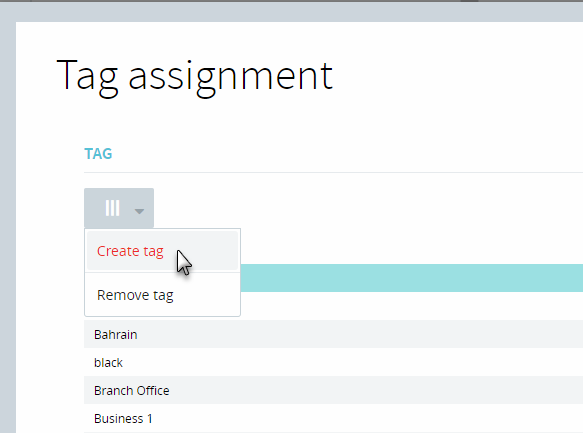
Next, give the new tag a name and click OK.

To remove a tag from the list, select the tag and then click Remove tag.

Filtering Your Player Selection
There are a few ways to filter the list of players that appear in the PLAYERS table, streamlining the process of applying tags to a larger selection of players.
- Using the Groups drop-down menu: this allows you to filter what players appear in the PLAYERS table based on the existing groups in your Navori Domain. By default, this is set to All Groups. Select a specific group (or multiple groups) to refine the number of players that will appear in the PLAYERS table.
- Using the Search Bar: using this search bar will allow you to enter specific characters/values that appear in the name of the players you want to display
In addition to the two filtering methods mentioned above, you can also filter players using a CSV file containing the exact names of all the players you wish to apply tags to, or using the Clipboard Paste option, which allows you to copty/paste the names of all of the players you wish to apply tags to. See the following section for more information on these processes:
Bulk Filter Players Using a CSV File
By creating a CSV file containing the exact names of all of your players as they appear in your Navori Domain seperated by a comma (for example: “Player 1, Player 2, Player 3”), you’re able to isolate the list of players displayed in the PLAYERS table to, allowing you to quickly bulk select any corresponding media players. With your CSV created:
- Click the Import CSV button
- When a dialogue box appears, click OK to proceed
- Select your CSV file then press Open
If any information in your CSV file matches the names of your players on your Navori Domain, any matches will be shown in the PLAYERS table. Any non-matches will be skipped.
You can then proceed to select which players you’d like to apply your chosen tag to.
Bulk Filter Players Using Clipboard Paste
Similarly to the process of filtering the PLAYERS table using a CSV file, you can copy/paste the names of your existing players on your Navori Domain to isolate which players are displayed in the table. To do so:
- From within the Tag Assignment Window, click Clipboard Paste
- Enter/Paste the names of your media players exactly as they appear in your Navori Domain, ensuring each listed player name is on it’s own row
- Press OK
If any information that you have entered here matches any records/names of players on your Navori Domain, these devices will be displayed in the table view and can then be selected. Any non-matches will not be displayed in the table view.
You can then complete the Tag Assignment process by pressing OK.