Chrome OS – QL Player Installation Guide
Introduction
The Google Admin Console allows IT administrators to manage Chrome OS devices, enforcing policies like app restrictions and user settings while ensuring security. It offers essential tools for application deployment, compliance, and device monitoring, making it crucial for large-scale management.
For detailed guidance on managing Chrome devices, policies, and settings, please refer to the Google Admin Console Chrome Guides.
This guide provides steps for installing and setting up QL Player on a Chrome Box. For more details on managing Chrome devices, please refer to the Google Admin Console Chrome Guides, which offer comprehensive instructions on policy enforcement and security measures.
Here’s a general procedure to install QL Player on a Chrome Box:
Prerequisites
Ensure the following items are ready before beginning the installation:
• Chrome Box powered on and connected to the internet.
• USB Input Device (e.g., mouse, keyboard) if necessary for installation.
• Display Output Device, such as a monitor, connected via HDMI cable.
Installation Steps
Step 1: Power On the Chrome Device
1. Power on the Chrome Box.
2. Ensure the device is connected to a stable internet connection.
Step 2: Connect Input and Output Devices
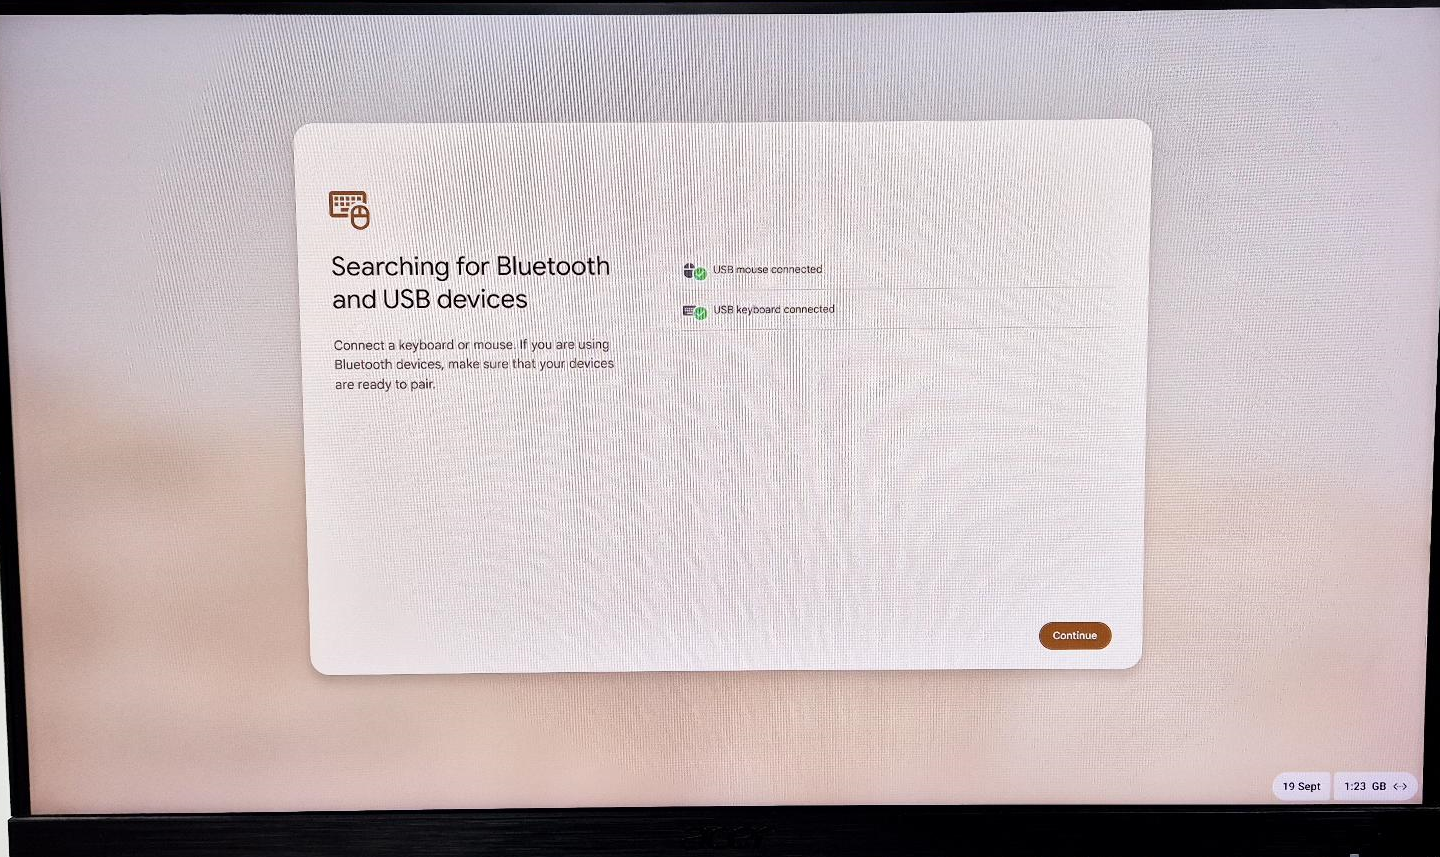
1. Connect the USB input device (required for installation).
2. Connect a display output device to the Chrome Box using an HDMI cable to check the display status.
3. Once the screen is displayed, proceed with the on-screen instructions by clicking continue
Step 3: Choose Your Setup
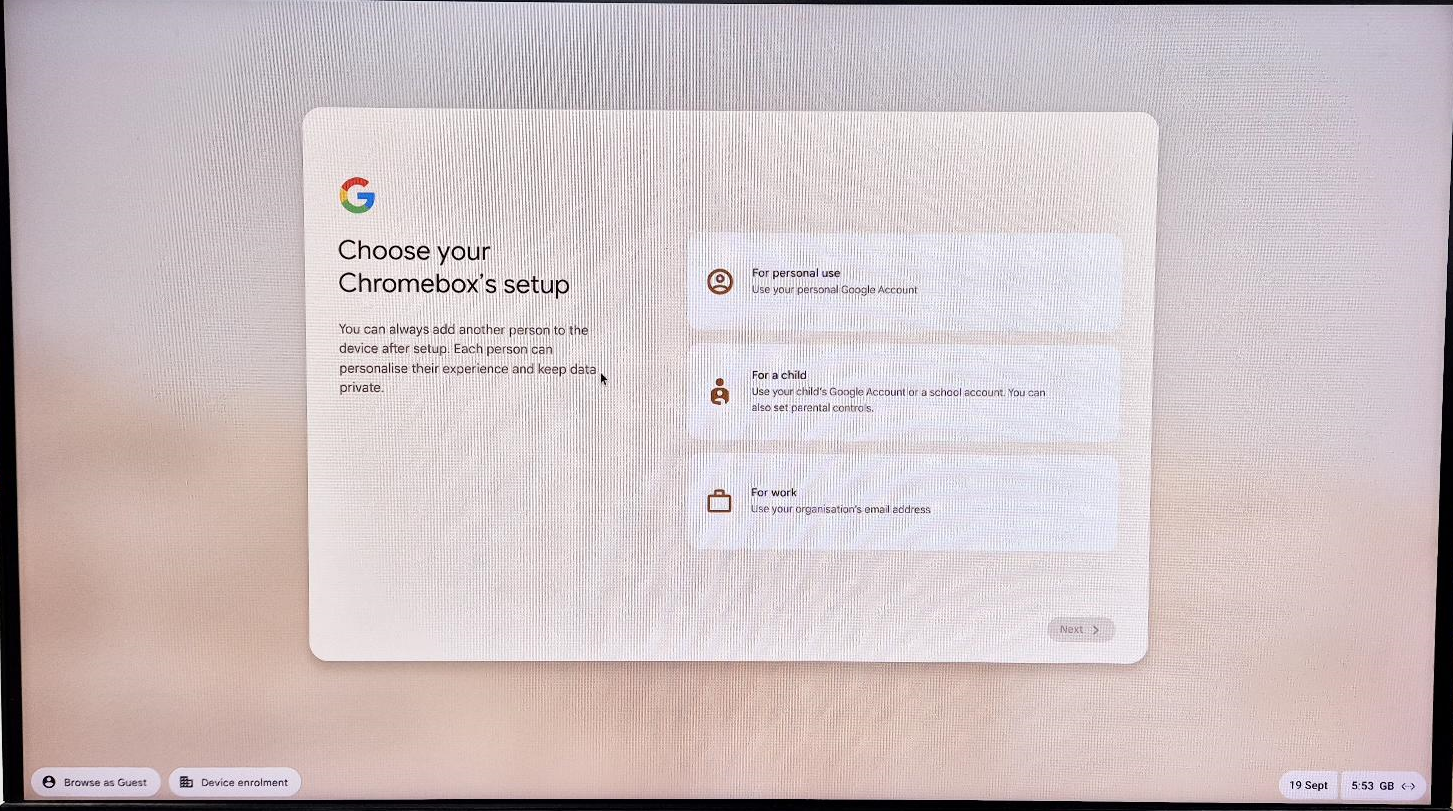
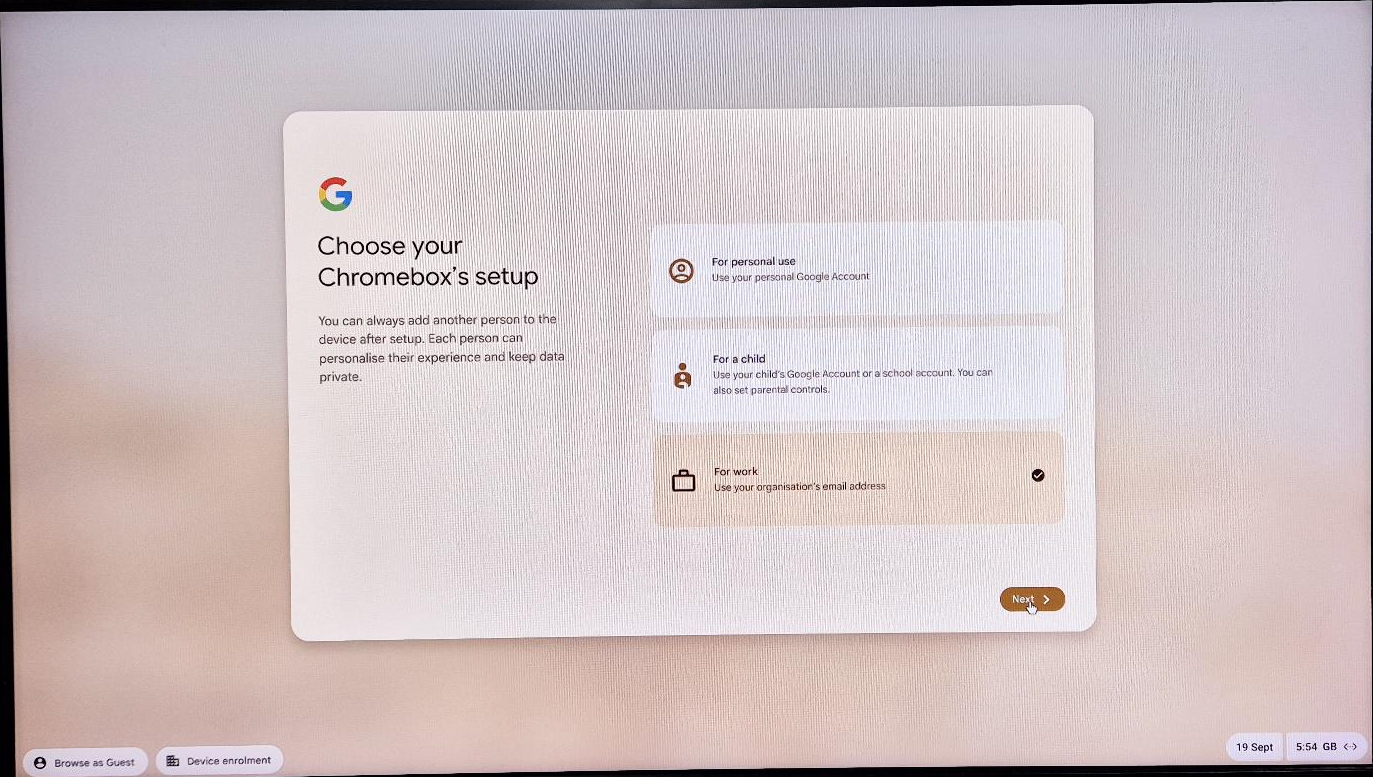
1. On the setup screen, select the option ‘For Work’ to configure the Chrome Box for professional use.
Step 4: Enrol the Device
- Select the option to enrol the device in the enterprise environment.
2. Click the ‘Next’ button to proceed.
Step 5: Log In with Your Google Workspace Account
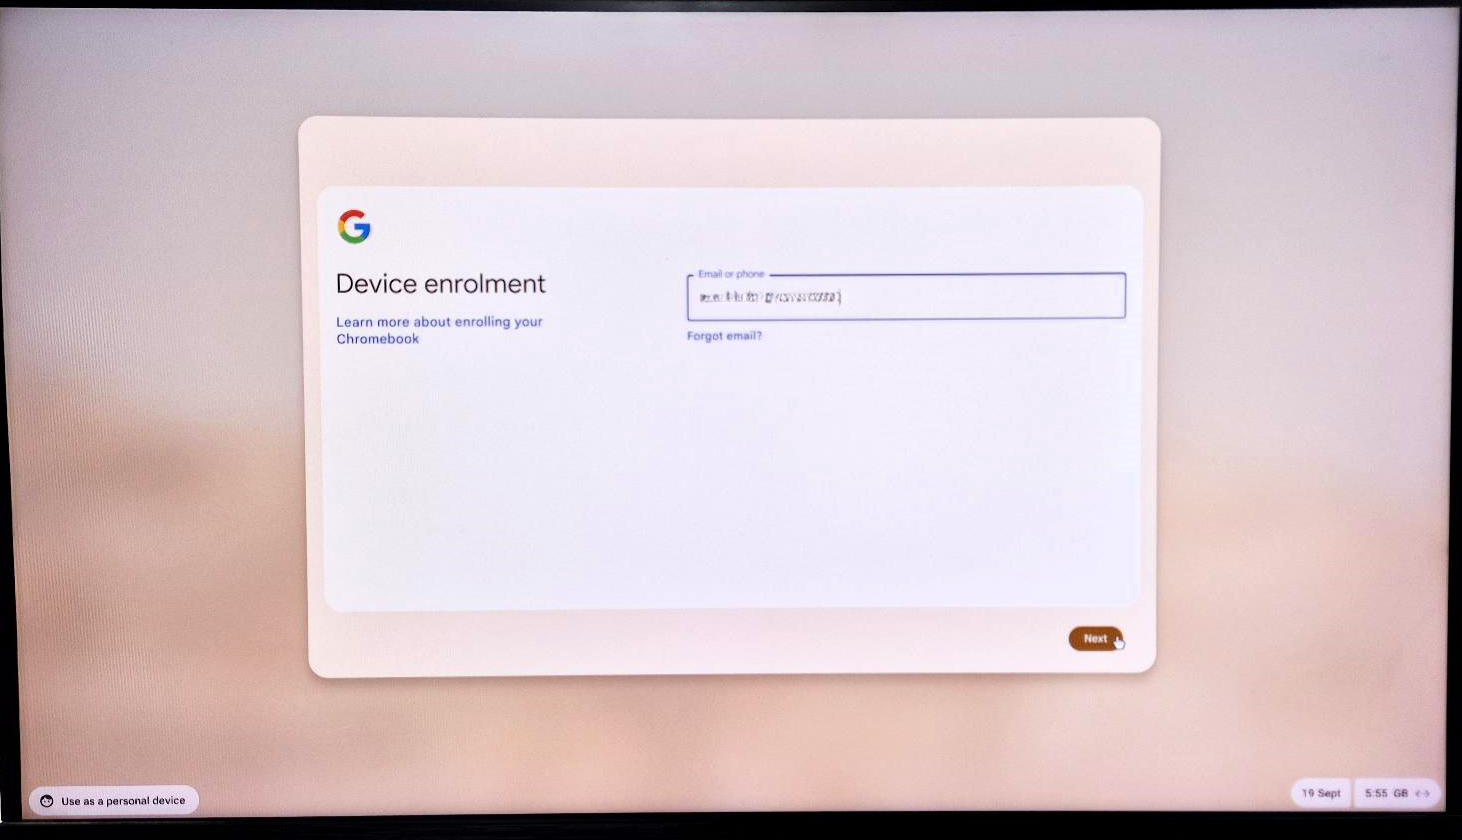
1. On the device enrolment screen, enter your email ID.
2. After entering the email ID, click ‘Next’.
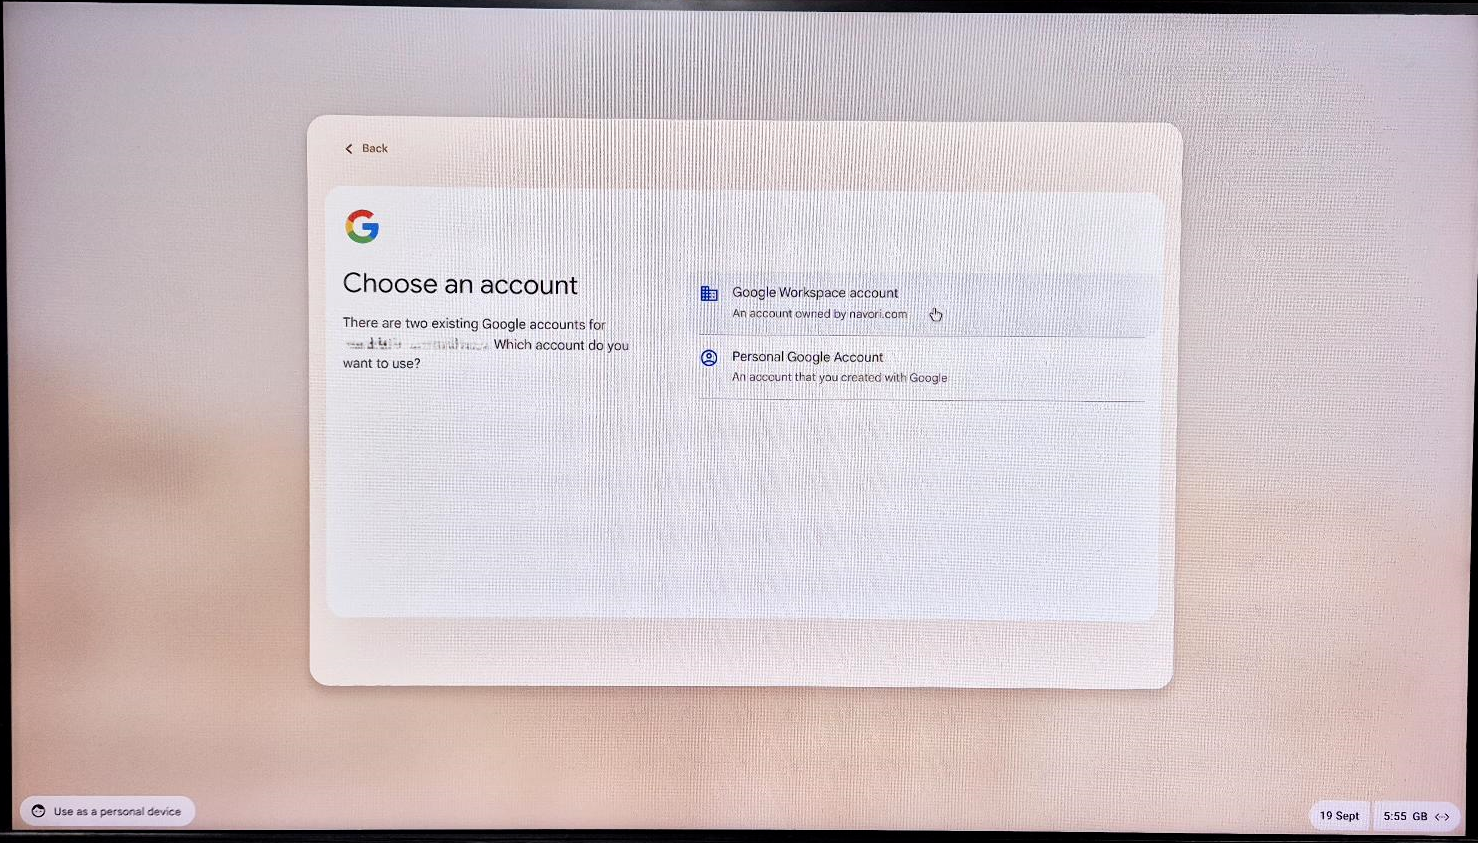
3. Select your Google Workspace account to proceed.
Step 6: Enter Your Account Credentials
1. Enter your email password and click ‘Enrol Device’.
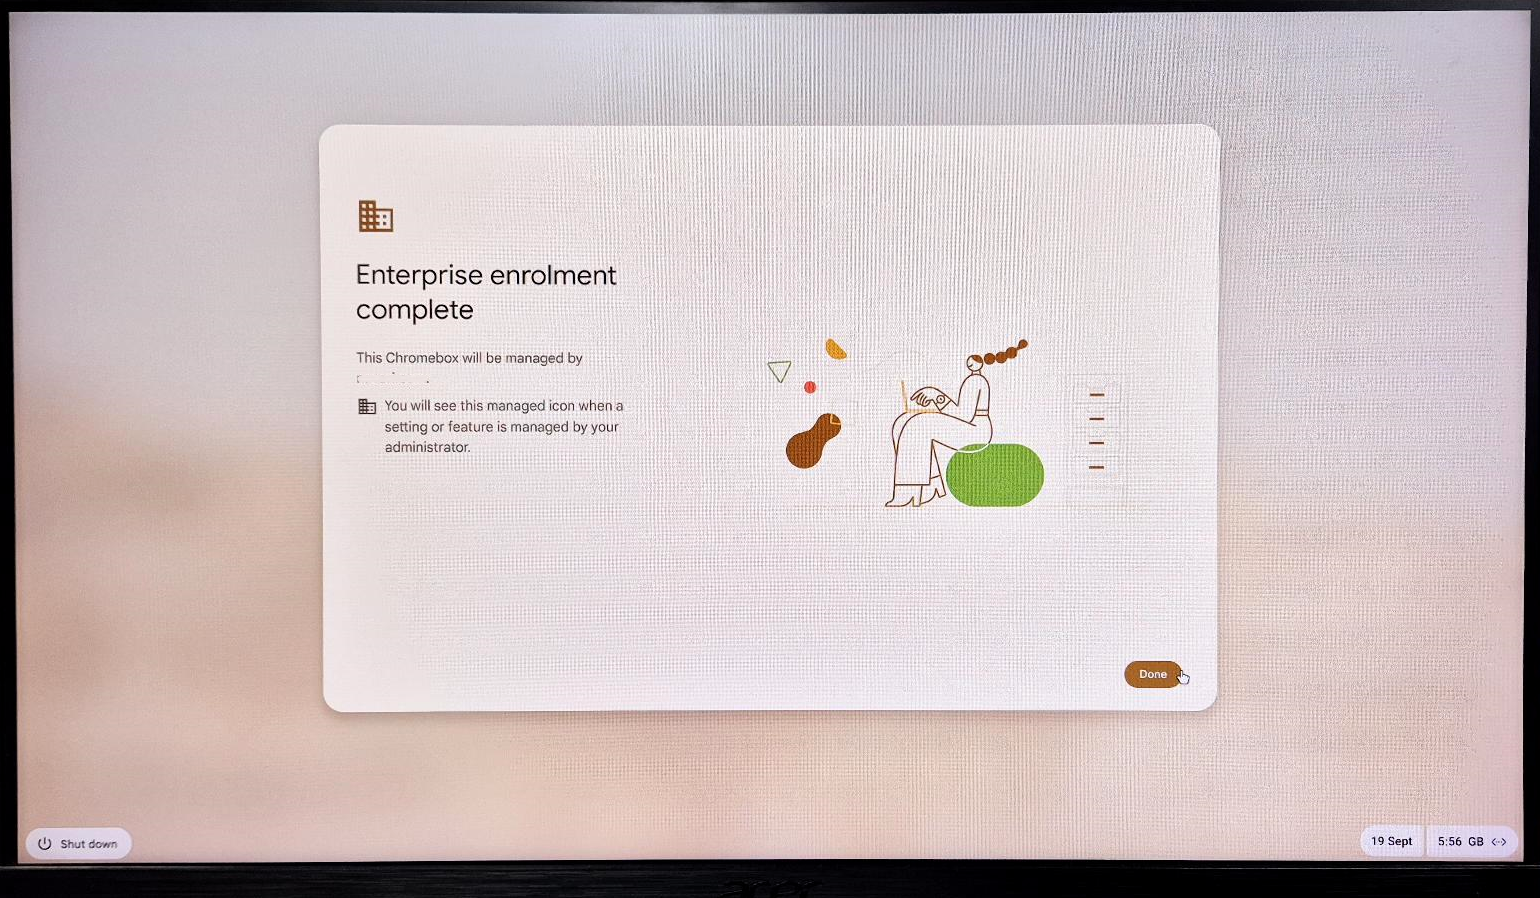
2. After successful enrolment, the system will display the message ‘Enterprise Enrolment complete
Step 7: Complete Enrolment
1. Click the ‘Done’ button to finalize the device enrolment.
2. You can verify the enrolment status by checking the Google Admin Console.
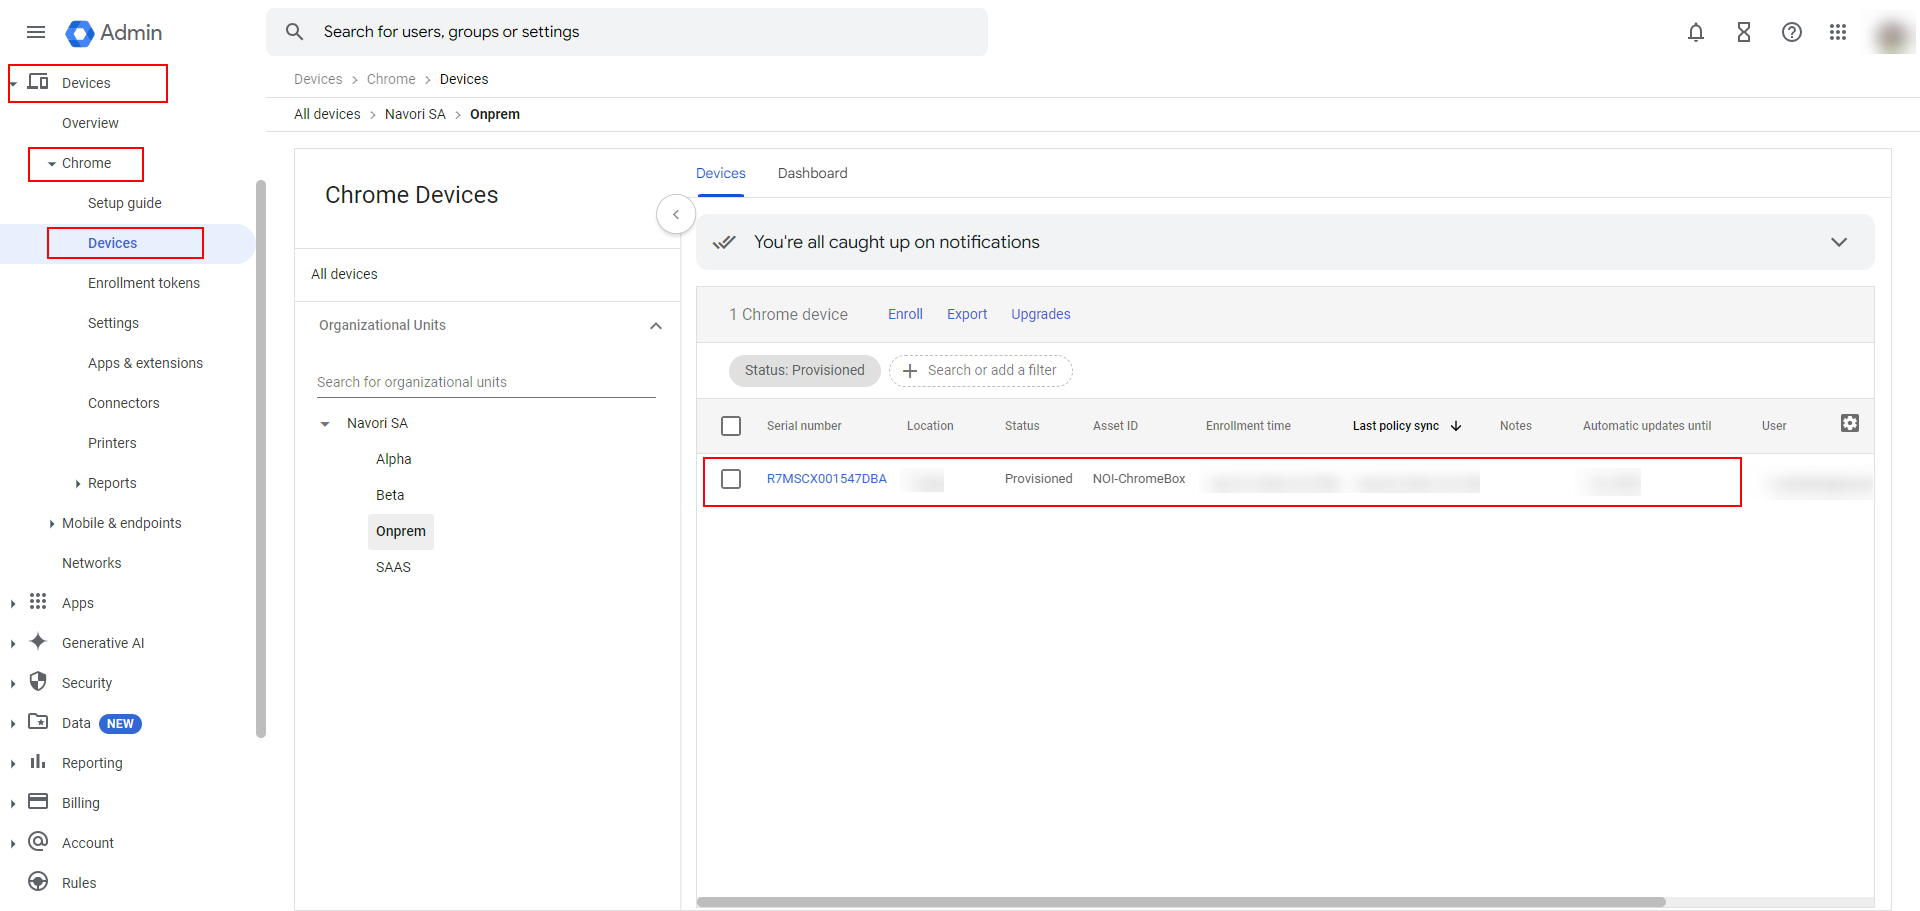
Once the device enrollment process is complete, you can view and manage the device from the Google Admin console. Here’s a step-by-step guide to access the enrolled Chrome devices:
Log in to Google Admin Console:
- Open your web browser and go to admin.google.com.
- Log in with your admin credentials.
Navigate to Devices:
- On the left-hand menu, click on Devices.
Go to Chrome Devices:
- Under the Devices menu, select Chrome devices.
Select Organizational Units:
- You will see a list of Chrome devices assigned to different Organizational Units (OUs).
- If you have multiple OUs, you can filter devices by selecting the desired Organizational Unit from the left panel.
View and Manage Devices:
- You can now see a list of enrolled devices. Clicking on a device will allow you to view its details, manage settings, or perform actions such as wiping or deactivating the device.
Steps to Add an App or Extension in Google Admin Console
Navigate to Apps & Extensions
- Click Devices → Apps & Extensions.
Add an App by URL
- Click the + button again.
- Select Add by URL.
- Enter this URL:
https://servername/QLPlayer/index.html. - Click Add.
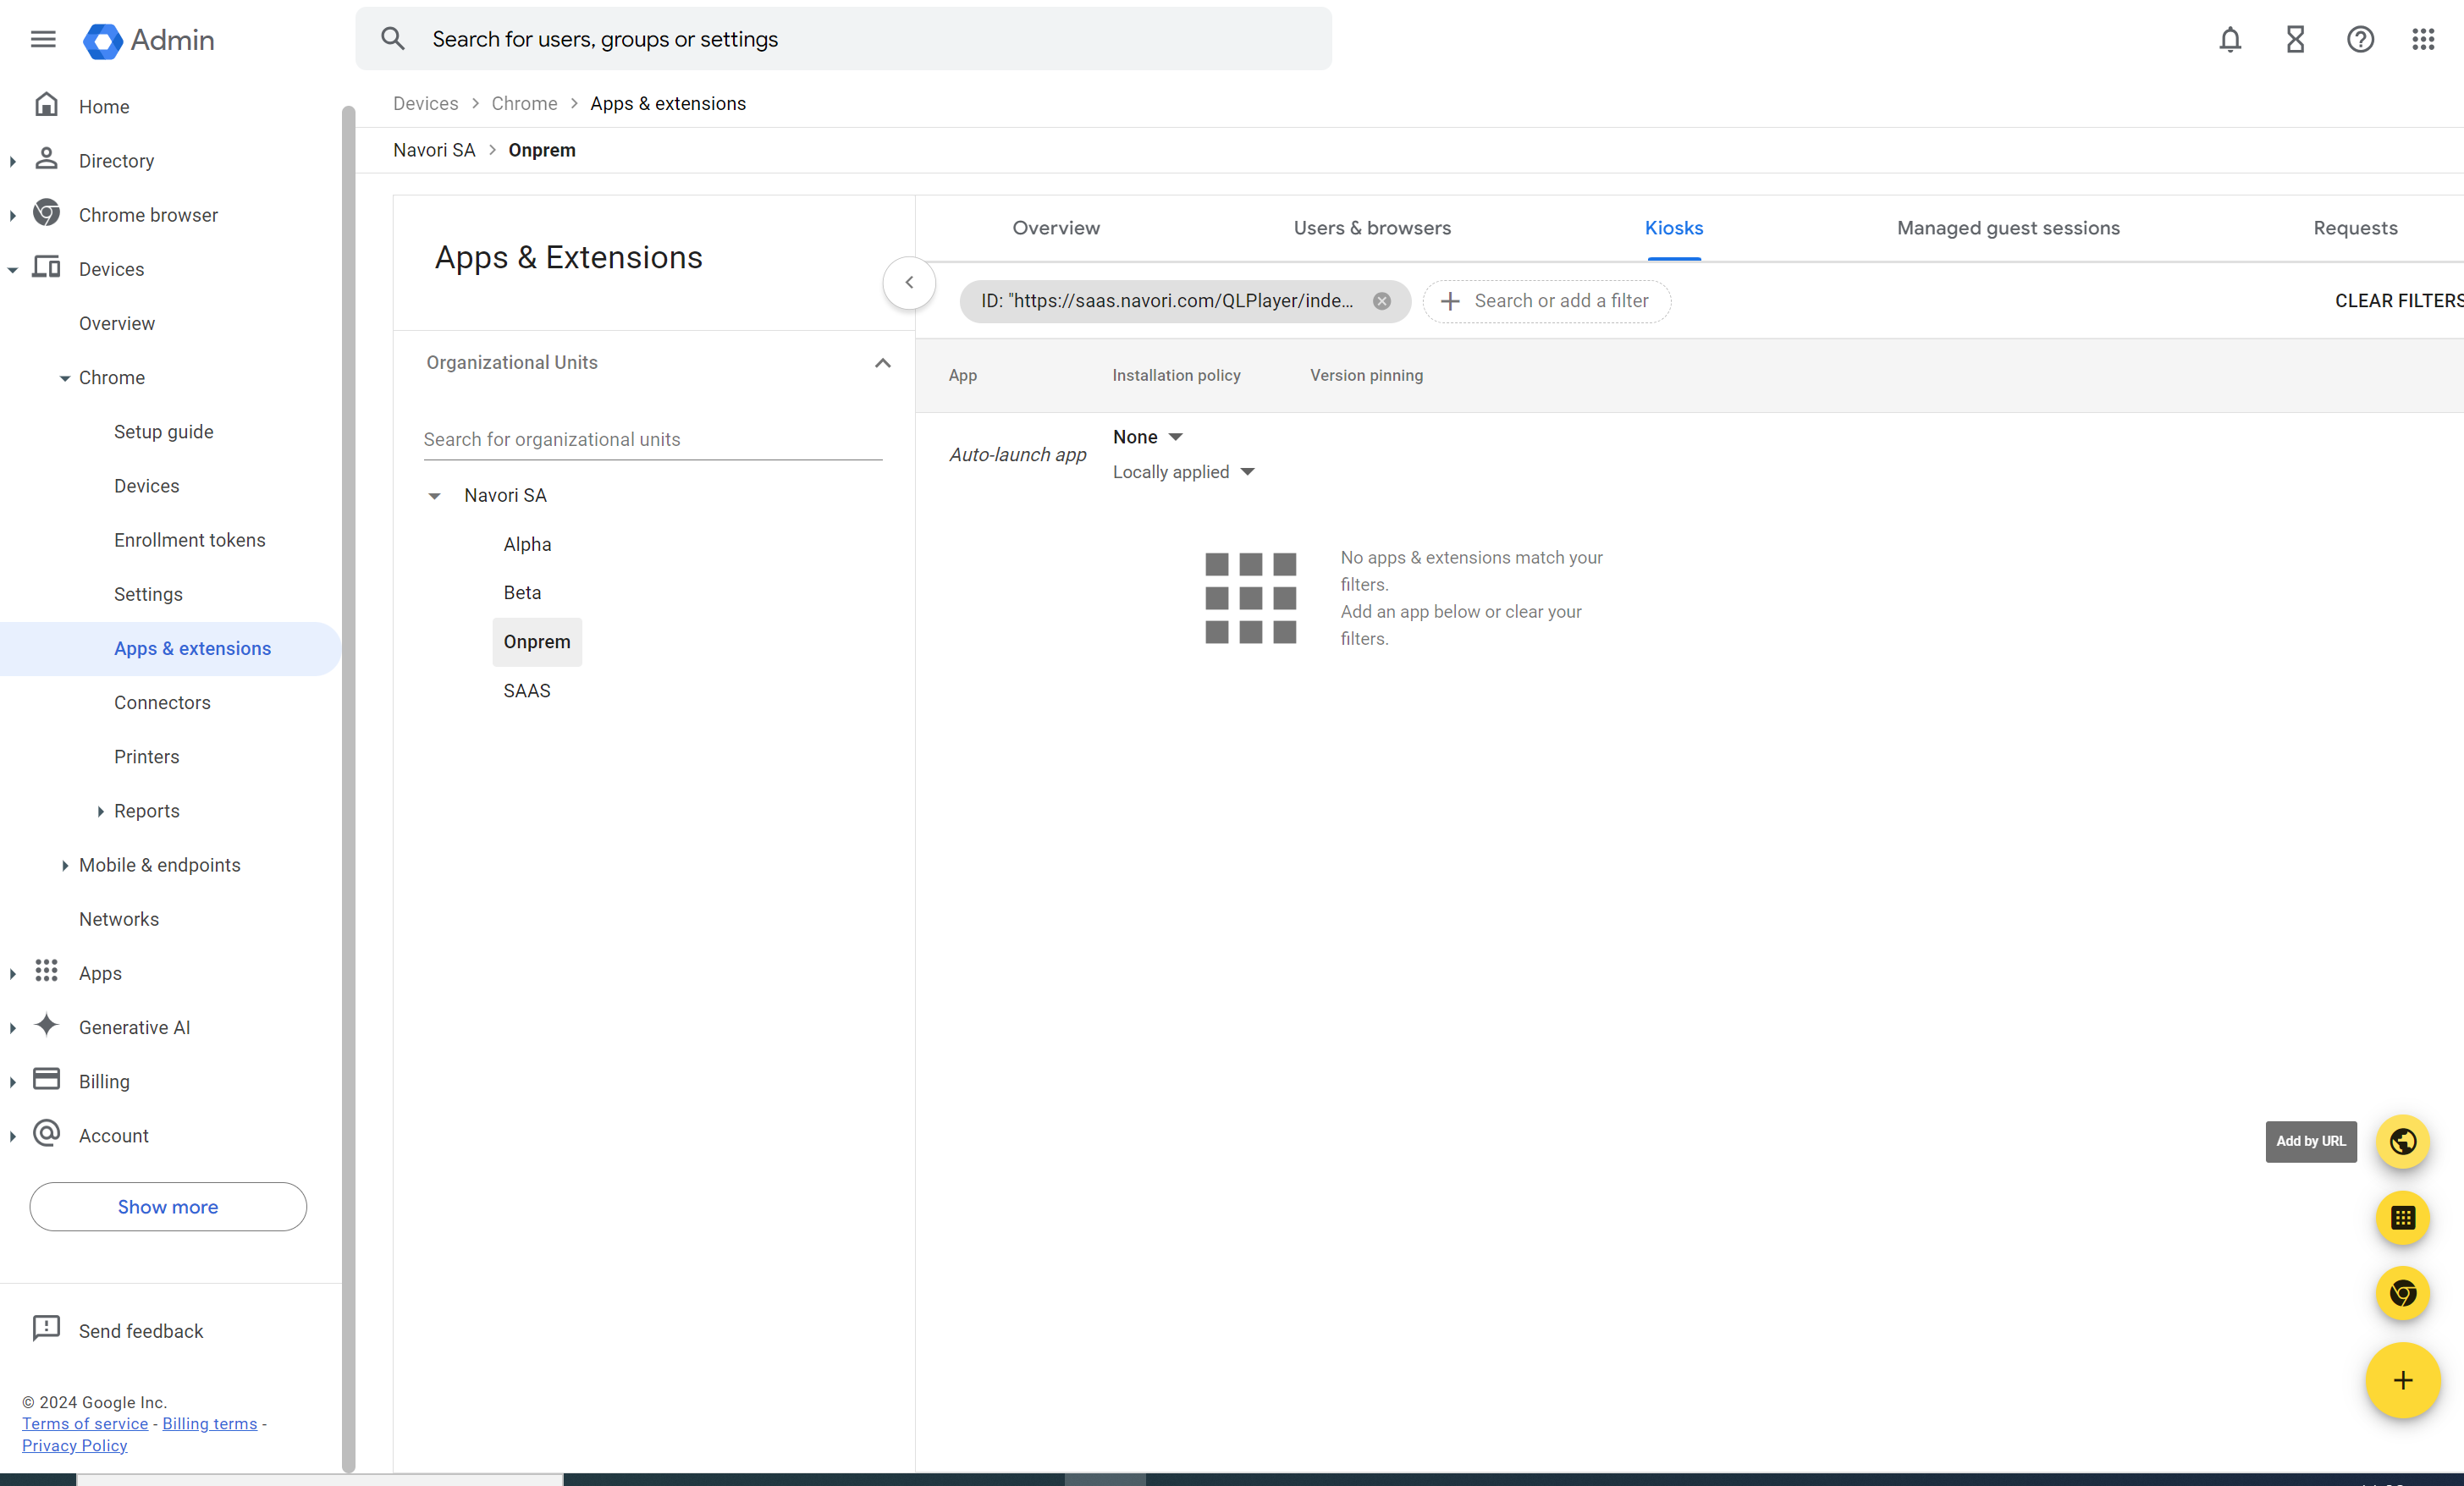
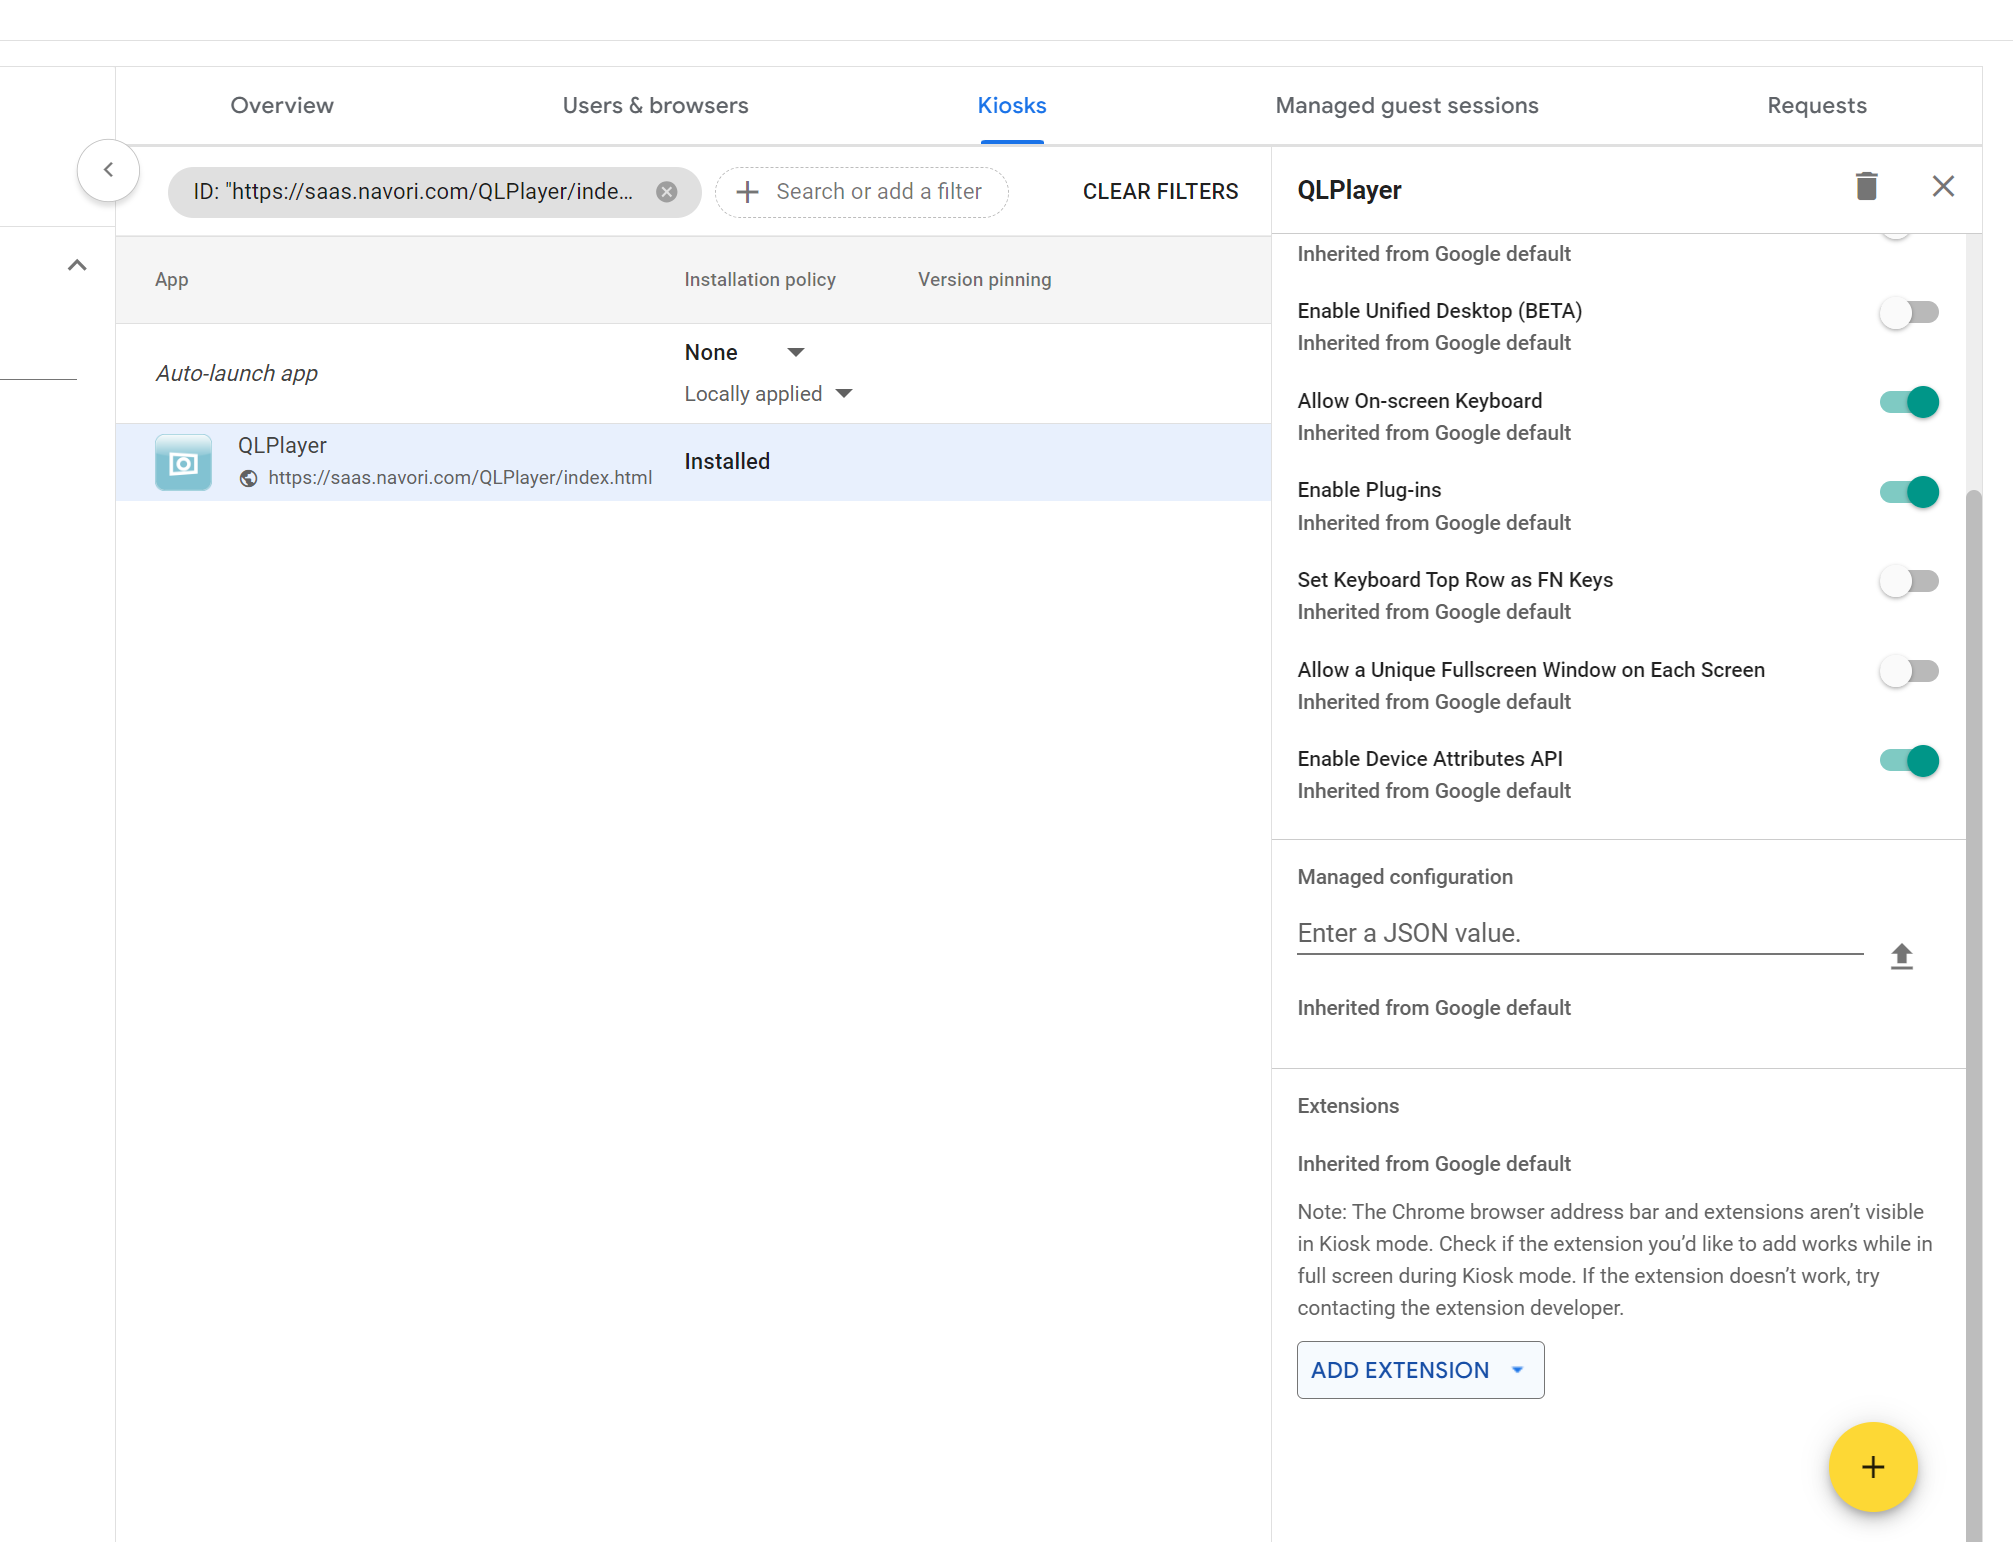
Then Select the app you added and click on “Add Extension” and search for App id eghijfcfppicndacpicpbmhokbfnhjig
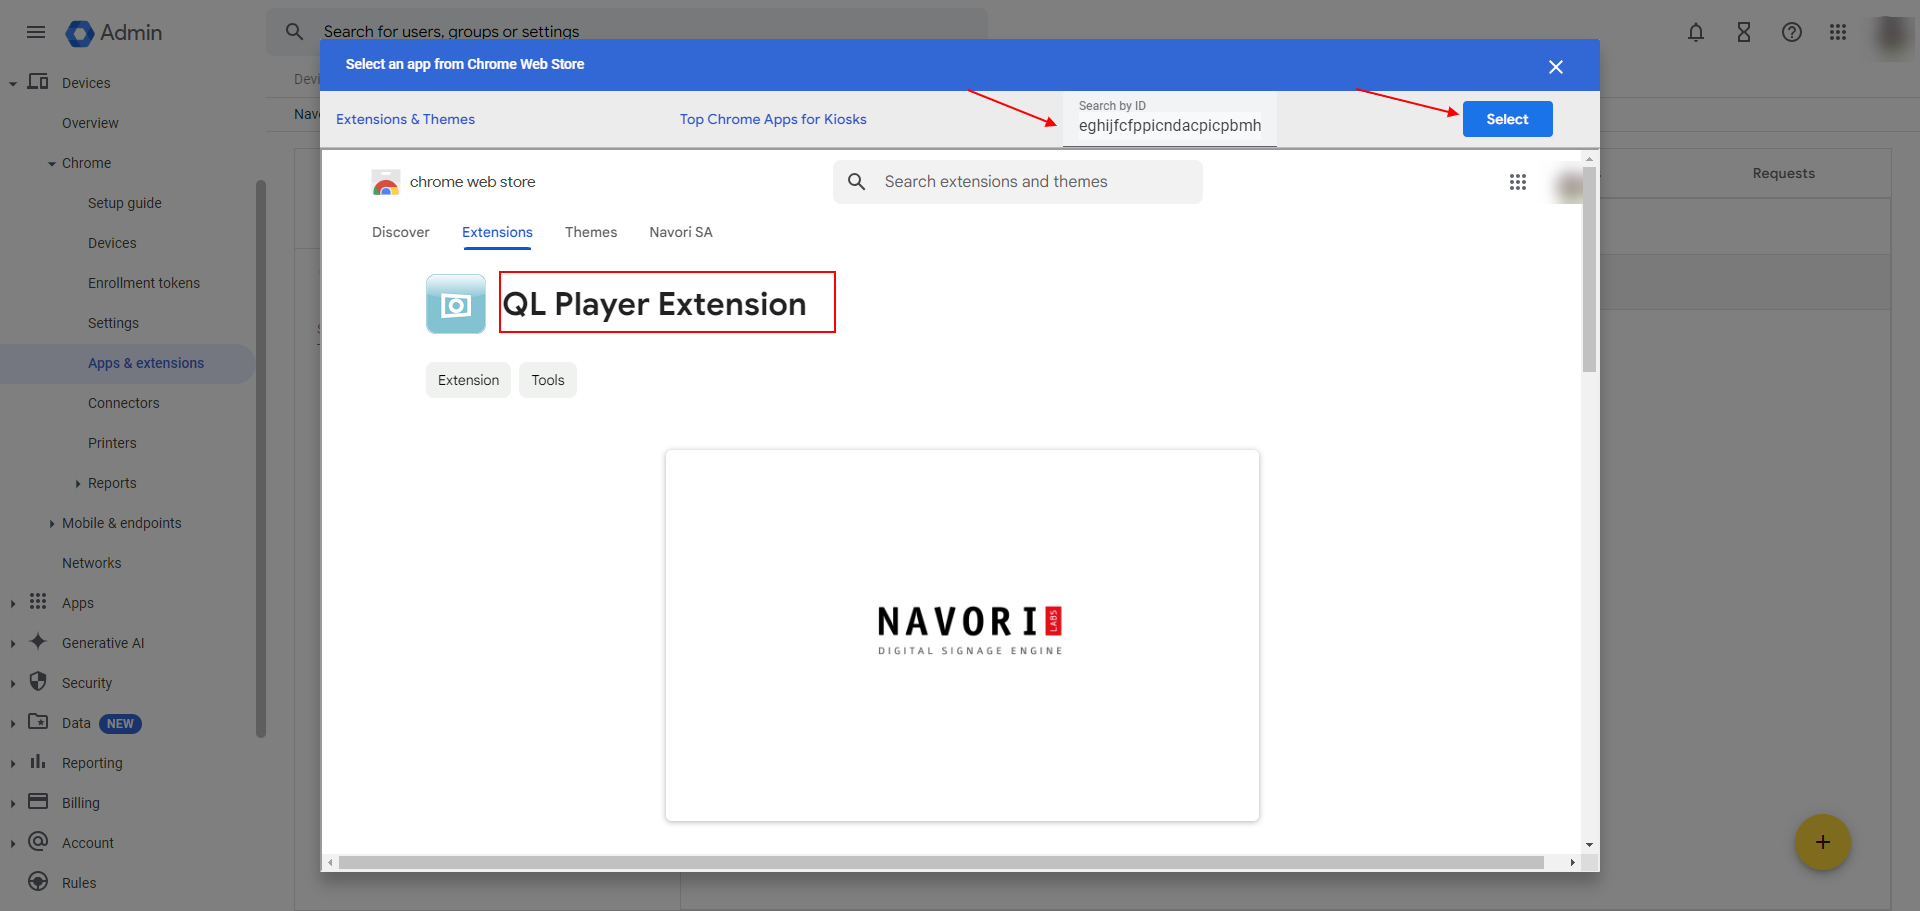
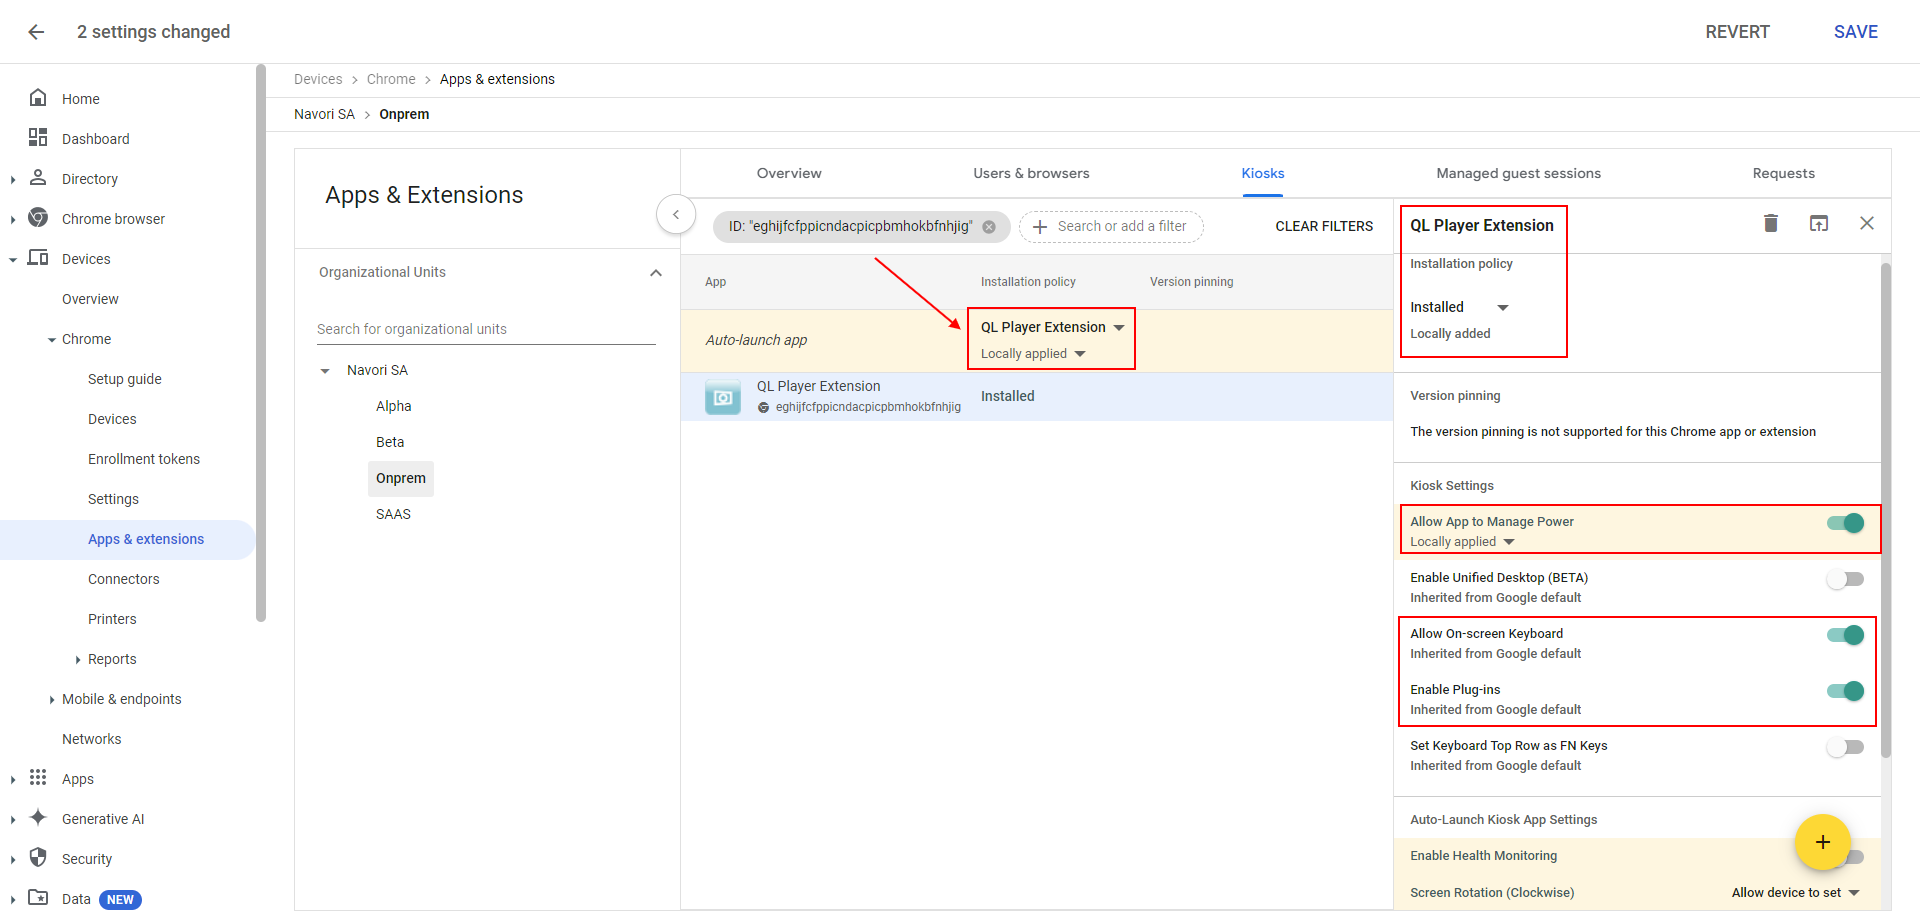
QL Player Extension Installation Policy and Kiosk Settings Configuration”
In the Apps & Extensions section for Chrome under the “Kiosks” tab. The image shows settings related to the QL Player Extension with the following key details:
- Installation Policy: Set to Installed and Locally added.
- Kiosk Settings:
- Allow App to Manage Power: Toggle is turned on (Locally applied).
- Allow On-screen Keyboard: Inherited from Google default.
- Enable Plug-ins: Inherited from Google default.
QL Player Installation and Activation
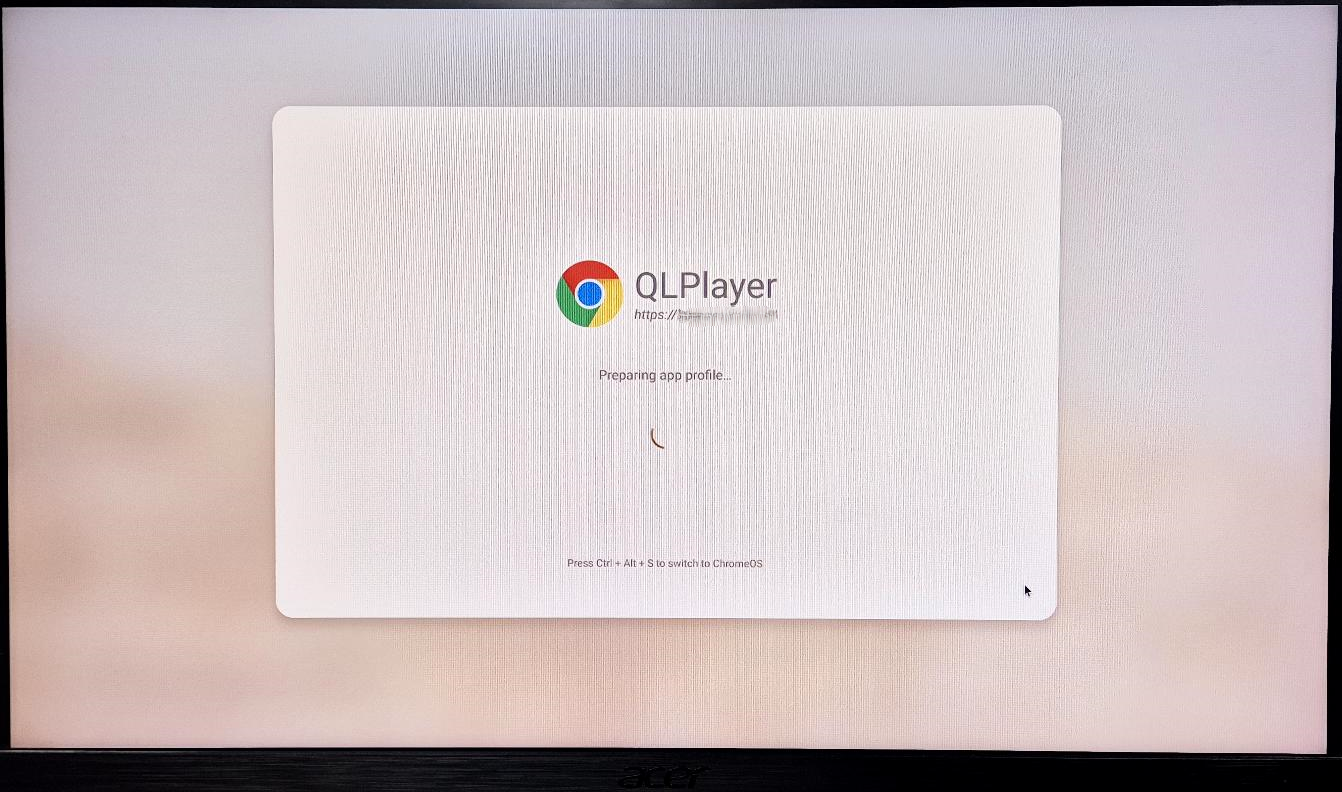
Step 8: QL Player Profile Preparation
1. After enrolment, the Chrome Box will automatically prepare the QL Player application profile.
2. The QL Player will begin installing automatically on the device.
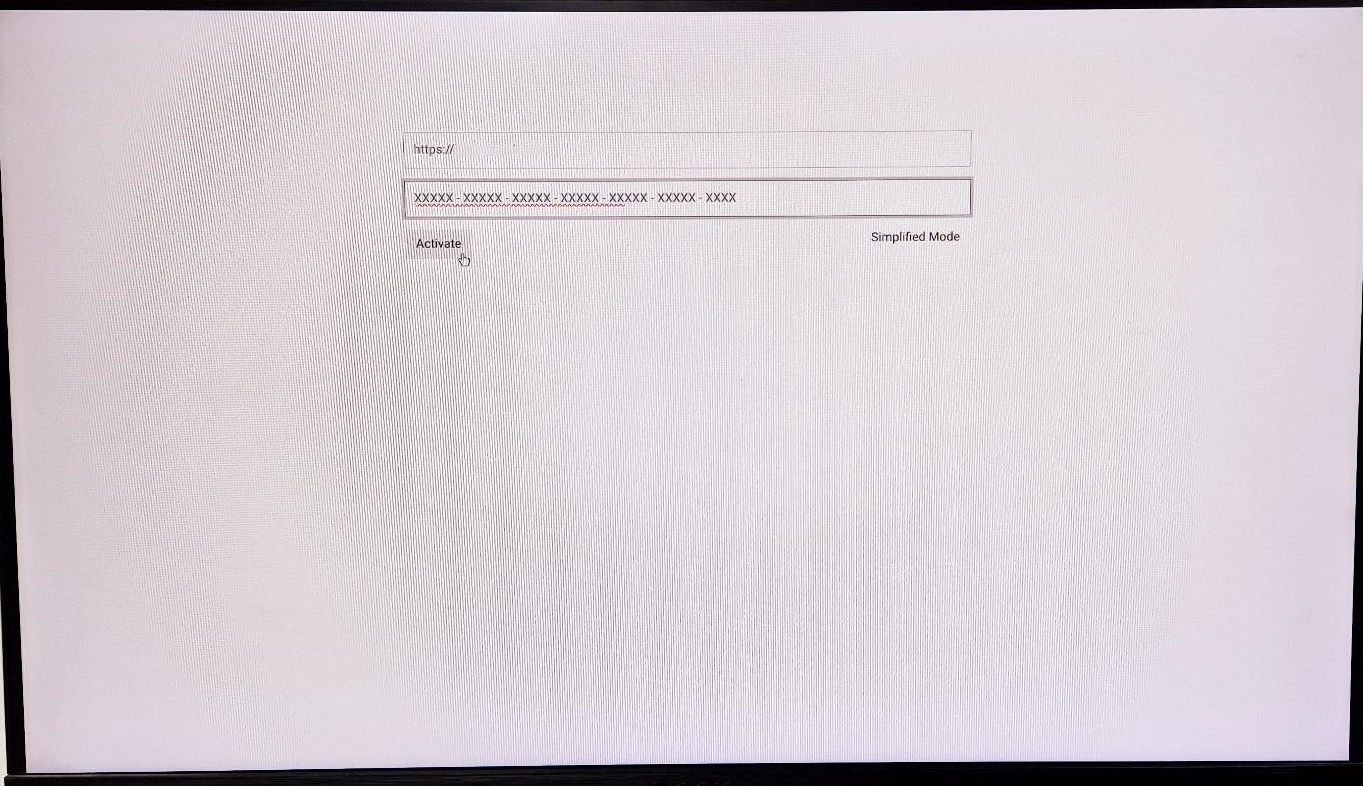
Step 9: QL Player Activation
1. Once installation is complete, a window for QL Player Activation will appear.
2. Enter the following details:
– On-Premises QL Server URL
– QL Player Serial Key
3. After inputting the required information, click ‘Activate’.
Step 10: Confirmation of Successful Activation
1. Once activated, a window displaying ‘Sky Cloud’ will confirm that:
– QL Player is successfully installed.- QL Player is fully activated.
